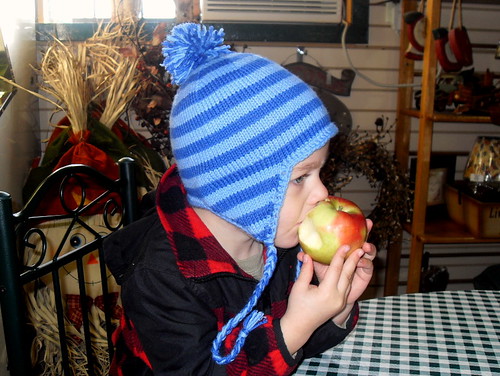
Are you done with your Christmas shopping? Maybe you're just starting to think about Christmas knitting. Maybe you're just a sucker for good deals. :-)
I've decided to gift a little Christmas knitters cheer to you all. On Cyber Monday (that's November 28, 2011, this year), I'm activating a coupon code that will get you all 30% off the Striped Earflap Hat pattern.
Go to Ravelry and to the pattern page and enter in code "cybermonday30" for your 30% off.
Or go to Etsy and to my shop and enter in code "cybermonday30" for 30% off there as well.
Merry (early) Christmas!
Sunday, November 27, 2011
Monday, November 14, 2011
Experimenting with food
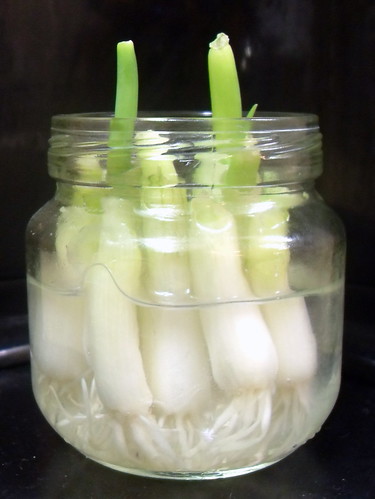
I discovered a handy little tip on Pinterest the other day that sent me running straight for the grocery store to buy a bunch of green onions. They had been marked down to $0.50 a bunch! They sat in the fridge for nearly a week before I cut them up and threw the greens in the crock pot in lieu of a yellow onion. I quickly sunk the white tips (with a bit of green left on them) in a baby food jar and covered them in water.
Two days later, and they're sprouting! It works!
Two days later, and they're sprouting! It works!
You'll notice that I've left off on my 30 Day Photo Challenge. I'll come back to it. I've learned a lot about taking pictures, but I've learned even more that I'm incredibly busy between the kids, the house, and work, and even moreso that I dislike my point and shoot camera very much.
Wednesday, November 9, 2011
Taking a break
I'm took a quick break from the 30 Day Photo Challenge. My husband is leaving in the dead of tonight to drive to Bloomington, Indiana, in order to meet with a trombone professor and scout out a potential DMA (Doctor of Music) program. We have friends from college who live in that area, so he contacted them to determine if they would like to get together. That's when we learned that our friends are expecting their second baby to be born any day now!
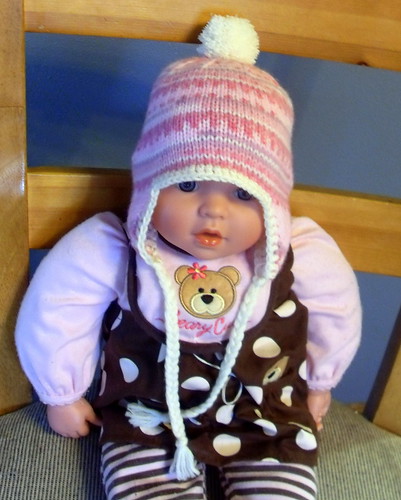
Of course, that meant I had some emergency baby knitting to be done. I couldn't send my husband to their home, potentially a home with a newborn, without a gift in hand for the little one. As I have no such newborn in my house anymore (big sad!!), I requested that one of Miriam's dolls be the model. The hat is made to fit a 14" newborn head, whereas the doll only has a 12.5" head, so it looks a bit too large for her.
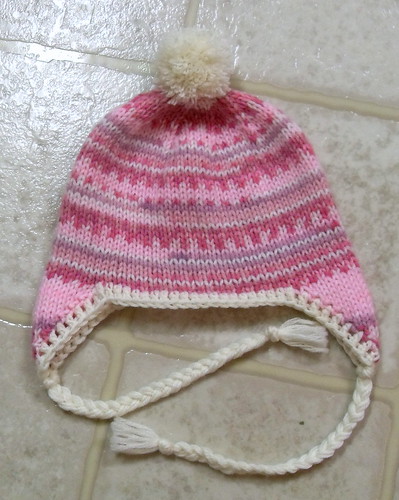
The hat is yet another version, knit from my Striped Earflap Hat pattern.
The yarn is leftovers from a sweater that I knit for Miriam. It is Sirdar's Snuggly Baby Crofter DK and is a "fake" fair isle striping yarn. It is SO soft! There's a good amount of acrylic in it (no wool at all), but it doesn't feel like acrylic at all. I still struggle with the "perfect number" for this yarn to make all the stripes and fair isle effect line up exactly, but I would definitely use it again, just to find this number!
Monday, November 7, 2011
Day 7: Something New
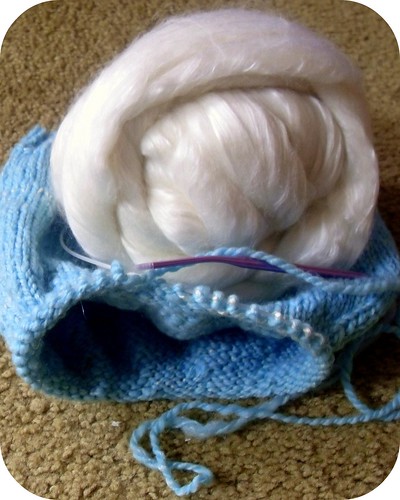
I don't do much for myself, as I really don't need much. The kids are growing and learning and experiencing; it's much easier and nicer to do things for them. But, for Miriam's birthday in September, a wonderful yarnie friend from Ravelry gifted me a handspun skein of yarn that she created herself. I instantly knew what I wanted it to become. A hat. For me. There was only 90 yards, but it is a gorgeous 90 yards. I found a simple hat pattern, but as I was knitting, I realized that no way was 90 yards enough for a hat on my head. I started contemplating finding a coordinating yarn to add stripes to the hat, give it a little interest and extend the use of the special yarn.
Then, this past weekend, my mother took me to a small Llama farm/fiber studio that was having a great sale. I found this amazingly soft, cuddly, and perfect Merino and Mulberry Silk blended top in a perfect white color to go with the pops of white bamboo spun in the special yarn. I cannot wait to spin this up so I can finish my hat!!
Taken on the Manual setting (F/2.8 and 1/6 shutter speed) and edited in Picasa with Saturation.
Sunday, November 6, 2011
Day 6: Childhood Memory
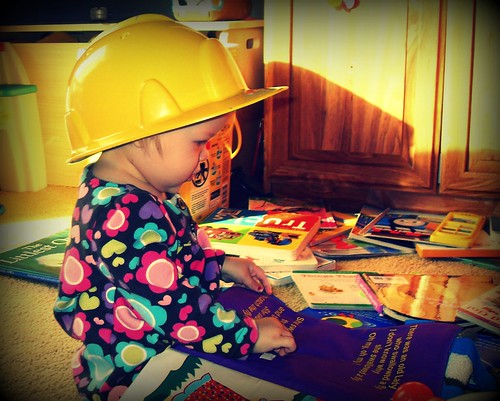
So many things happened today that could have fallen under the "childhood memory" category. It's amazing to see my children play and learn like I did! This picture, taken earlier in the day, captures Miriam wearing a hard hat and reading stories. I used to go to work with my father when I was a bit older than her (maybe just a bit older than Benjamin, actually). He worked in a factory at the time, and my brother and I would ride our tricycles around the large open spaces not too far from the machines. I can't remember if I had to wear a hard hat. Likely not, as there wasn't a problem with toddlers being in a factory "back in the day," but I remember wanting so much to be like my father. Alas, I turned out much more like my mother, and I never could put down a good book!
Photo taken on the Auto setting with flash. Edited in Picasa with Saturation, then further edited in Picnik with Lomo-ish and Vignette effects.
Photo taken on the Auto setting with flash. Edited in Picasa with Saturation, then further edited in Picnik with Lomo-ish and Vignette effects.
Saturday, November 5, 2011
Day 5: Someone I Love
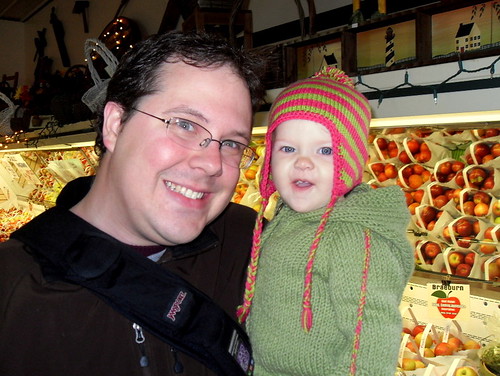
I almost thought it would be cheating to pick my kids as subject matters today. (Plus, I didn't want to have to pick a favorite.) I decided to showcase my husband, Chris, but there was never a moment to get him alone. And this photo says a lot about that. Chris is an amazing father who our children adore. So today, instead of getting "someone," you get to see the "someones" I love, namely, my favorite boys!
Taken on Auto setting with no flash. Edited in Picnik using "1960's Effect."
Taken on Auto setting with no flash. Edited in Picnik using "1960's Effect."
Friday, November 4, 2011
Day 4: Favorite Color
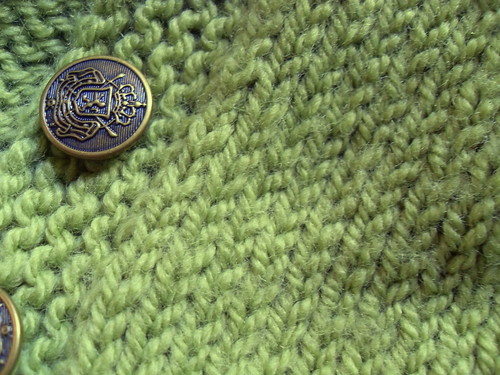
This is a closeup of a sweater that I knit. Not only do I love the color green, but the texture really speaks to me too.
This was SO HARD! I have a little point and shoot (Samsung L200 10.2 MegaPixel), so truing colors in the original photo was very difficult.
Photo was taken on the Manual Setting (F2.8, Exposure time 1/15 seconds), and edited in Picasa using Saturation.
This was SO HARD! I have a little point and shoot (Samsung L200 10.2 MegaPixel), so truing colors in the original photo was very difficult.
Photo was taken on the Manual Setting (F2.8, Exposure time 1/15 seconds), and edited in Picasa using Saturation.
Thursday, November 3, 2011
Day 3: Clouds
It's been grey and cloudy lately. It was raining this morning, but it cleared up enough for me to run outside and snap this photo.
Taken on the Scene setting, with flash. No editing done.
Taken on the Scene setting, with flash. No editing done.
Wednesday, November 2, 2011
Day 2: What I wore
Nothing too special about what I wore. It was a chilly and rainy day, so I had on my favorite jeans, a t-shirt, and my husband's high school track sweatshirt. The kids were also very cuddly, and this photo was taken while Benjamin was falling asleep for his nap.
Tuesday, November 1, 2011
Day 1: Self- Portrait
Portrait taken with 10 second timer on the "portrait" setting using flash and facial detection. Edited in Picasa using Soft Focus and Warmify.
Monday, October 31, 2011
30 Day Photo Challenge
I've been wanting to improve my photography skills. I've been long lamenting that my pictures suck because of my camera. That may be true to a point, but perhaps I need to learn more about how to use my camera. So, I'm going to do a study on it, and to encourage me along, I'm doing a 30 Day Photo Challenge done by many bloggers before me.
Friday, October 28, 2011
Benjamin's Pumpkin
Benjamin took great care in picking out this pumpkin. He wanted to be sure to get a small pumpkin, "just my size." And he picked up nearly 2 dozen pumpkins to determine if they were the right size.
This morning, we carved his pumpkin. I scooped out the guts last night, so it was all ready to go for him. I gave him a crayon and he colored on the face for me to cut out. I did the cutting, he did the poking out of the pieces.
I placed a lit candle inside for him to see it all "spooky, spooky!" He immediately blew it out and said, "Now we can have birthday cake!!"
Tonight, he made us sing "Happy Birthday" to the pumpkin before he blew out the candle. :-)
Wednesday, October 26, 2011
Tuesday, October 25, 2011
Are you mightier than your child?
I have a few friends who have children the same ages as Benjamin and Miriam, and we keep in touch via Facebook. As is common in parenting toddlers, behavior and discipline are frequently visited topics. Sometimes, I'm really appalled by what I read from them! Spanking and washing out of mouths and expected sleep training!
I think some people believe I am a permissive parent. I don't believe I am. We have discipline in the house. However, we use discipline by this definition: "training that corrects, molds, or perfects the mental faculties or moral character", whereas it is commonly used by this definition: "control gained by enforcing obedience or order."
Are you mightier than your child?
Benjamin and Miriam are little people. They have thoughts and needs and wants and wishes. They have goals they want and need to attain, goals that I did not give them. Of course, I may view these things as unimportant, but to my 2 year old, making a teetering tower of blocks stand tall on the edge of a soft couch is the most important task he will take on today. He will fail, and he will get upset. It will be childish. But he is a child and I cannot expect him to behave as anything else. Instead, I will respond to him with compassion, empathizing that it is really frustrating when things don't work out as planned. That is an adult concept that he can learn. And he will learn it. He will respond to me, "Yes, mama, it makes me mad." I immediately give him the words he can use to express how he feels so that he doesn't need to throw the blocks across the room, and I won't have to suffer through a tantrum that tries my patience and "requires" punishment.
I want to teach my children what it is like to live in an adult world. Isn't that the goal of parenting, to foster these babies into functioning members of society? What does spanking teach your child? That might is right? I'm bigger than you, so do as I say?
My one year old is learning to put things away. She has her own idea of what this means though. After she placed a kitchen towel in the frying pan cabinet, I took it back out and asked her to hang it back on the stove handle. She told me an emphatic, "No!" I let her walk away. She has the right to refuse my requests, just as I have the right to refuse your requests. Eventually, she will learn that telling me, or anyone, "no" will have natural consequences. She'll learn that if she doesn't put her shoes away when I ask her to, she won't be able to find them on her way out the door. She'll learn that other children won't want to play with her if she doesn't do as they ask sometimes. As an adult, she'll learn that she won't keep a job for very long if she only does things that she likes to do. But I let her make her own decisions, without fear of disappointing me.
I'm a gentle parent. I don't stress about my children's behavior. I believe in natural consequences helping them learn the order of our society. My children respect me because I respect them.
"Children aren't to be molded; they are little people to be unfolded."
Monday, October 24, 2011
Striped Earflap Hats
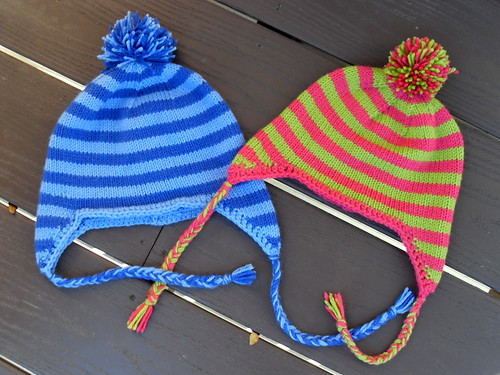
I have a goal to knit my kids their winter hats every year. This year, they got matching hats!
Benjamin loves the pom-pom. It's his "favorite."

Miriam likes to play dress-up, so she adores wearing hats because they make her feel pretty!
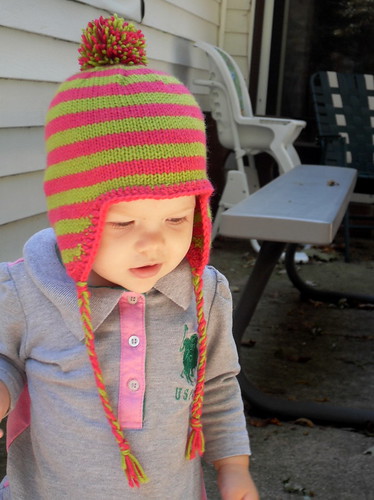
This is a great hat. It's so fun to knit, and apparently fun to wear! I would have knit enough hats for the whole family if I thought my husband would wear a hat. :-)

You can knit one too! The Striped Earflap Hat pattern fully explains how to do jogless stripes and how to add the crochet edging to the hat. A garter stitch edging is also included as an alternative option. Details for how to make the ties and pom-pom are also included. The pattern includes instructions for knitting sizes from newborn (14" head) all the way to large adult (24" head) using a DK weight yarn.

Benjamin loves the pom-pom. It's his "favorite."

Miriam likes to play dress-up, so she adores wearing hats because they make her feel pretty!

This is a great hat. It's so fun to knit, and apparently fun to wear! I would have knit enough hats for the whole family if I thought my husband would wear a hat. :-)

You can knit one too! The Striped Earflap Hat pattern fully explains how to do jogless stripes and how to add the crochet edging to the hat. A garter stitch edging is also included as an alternative option. Details for how to make the ties and pom-pom are also included. The pattern includes instructions for knitting sizes from newborn (14" head) all the way to large adult (24" head) using a DK weight yarn.
Friday, October 21, 2011
Fall is definitely here
It is fall here in Wisconsin. For awhile there, we had a really beautiful Indian summer with temperatures in the 70s and 80s. But, last weekend came and with it a wind that brought rain and 40s and 50s. It felt like the right time to take our kids to the pumpkin farm.
Chris and Miriam were checking out the apples in the store because it was almost too windy to be outside.
In the meantime, Benjamin stole an apple! The shop keeper was nice enough to let him keep it, especially since we bought a 1/2 bushel of apples to take home.
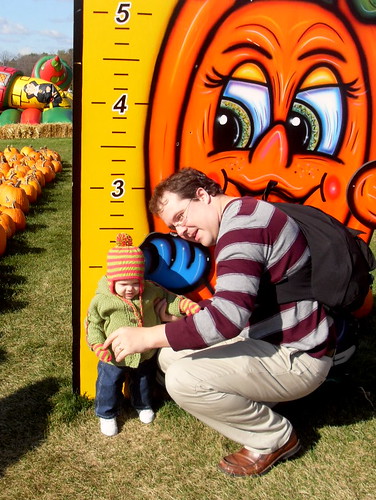
We have an annual tradition of using the "How Big Am I" board at the farm to photograph the kids.
Miriam got trapped by pumpkins nearly as big as her!
And Benjamin picked the perfect pumpkin.
Thursday, October 20, 2011
Split Pea and Bacon Soup
When it comes to kitchen utensils, machines, and gadgets, there is nothing I love more than my crockpot. It's the traditional 1950's housewife, residing in the kitchen, allowing you to ignore it all day and still churning out magical yumminess at dinnertime. I have this crockpot (but in white and 10 years old), and I love that it has 4 cook settings plus a "warm" feature to keep your food hot in the event the cooking stops before you have a chance to attend to it. The only thing I could wish for is that it would have the ability to choose the warm feature without first having to go through the 4-10 hours of cooking.
There are a few staples in my crockpot that I have not branched far from: pot roast, pork and sauerkraut, rotisserie-style chicken, chicken soup, taco soup, and chili. However, I'm trying to expand our family's diet horizons, introduce new foods to my toddlers (holy cow! I have 2 of them!!), and still keep it nice and easy. I have been returning to the foods I ate while living in Germany: simple, inexpensive, mostly vegetarian, but extremely delicious foods! This means a return to legumes.
Split Pea and Bacon Soup
1 pound dried split peas
1 pound bacon
1 medium yellow onion
1/4 tsp pepper
1 tsp kosher salt
2 cans low-sodium chicken broth (I used Swanson 14.5oz cans)
enough water to make 5 cups liquid when combined with broth (I needed 1 3/8 cup - or 11 ounces)
Dump the split peas into the crockpot and pick through to find any rocks, stones, or withered and discolored peas. There's no need to presoak your peas if you're cooking in the crockpot. Slice your bacon into 1/2 inch pieces. I slice it while frozen and the fat is firmed up. Don't worry about thawing it after slicing. Just break it up and toss it on top of your peas. It'll thaw before you turn the crockpot on. Chop your onion and toss in the crockpot on top of the bacon and peas. Sprinkle your salt and pepper on top. Pour your broth and water over everything. No need to stir anything.
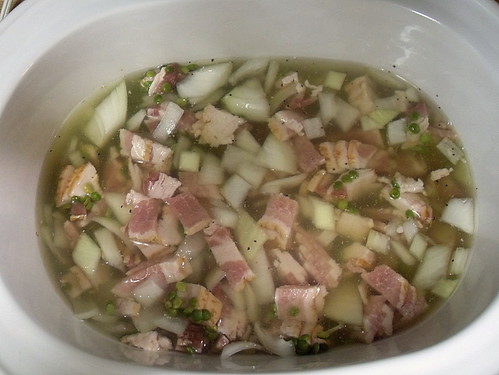
Cover and cook on low for 8-10 hours.
When it's all done cooking, you can either use a potato masher and mash the peas into oblivion or use a stick blender (my preference) to get a nice smooth soup.
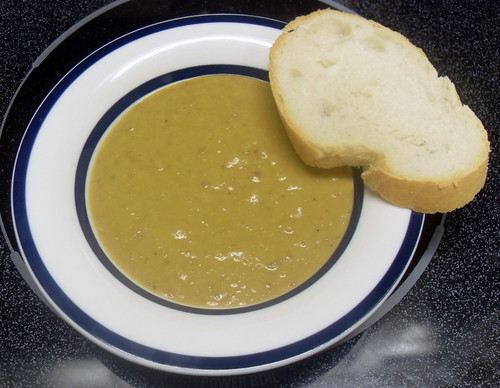
Ideally, I'd like to serve this soup with deep fried croutons, but I didn't have any bread to make them from. Why deep fried? It keeps the croutons from getting soggy in your soup. A nice crusty bread is just as good, however!
And I won't pretend this doesn't have a lot of fat. It uses a whole pound of bacon, in case you hadn't noticed. I suppose, if you're scared of a little bacon, you'll just have to use the tried and true ham. But, bacon will win you brownie points with your husband. Just saying.
There are a few staples in my crockpot that I have not branched far from: pot roast, pork and sauerkraut, rotisserie-style chicken, chicken soup, taco soup, and chili. However, I'm trying to expand our family's diet horizons, introduce new foods to my toddlers (holy cow! I have 2 of them!!), and still keep it nice and easy. I have been returning to the foods I ate while living in Germany: simple, inexpensive, mostly vegetarian, but extremely delicious foods! This means a return to legumes.
Split Pea and Bacon Soup
1 pound dried split peas
1 pound bacon
1 medium yellow onion
1/4 tsp pepper
1 tsp kosher salt
2 cans low-sodium chicken broth (I used Swanson 14.5oz cans)
enough water to make 5 cups liquid when combined with broth (I needed 1 3/8 cup - or 11 ounces)
Dump the split peas into the crockpot and pick through to find any rocks, stones, or withered and discolored peas. There's no need to presoak your peas if you're cooking in the crockpot. Slice your bacon into 1/2 inch pieces. I slice it while frozen and the fat is firmed up. Don't worry about thawing it after slicing. Just break it up and toss it on top of your peas. It'll thaw before you turn the crockpot on. Chop your onion and toss in the crockpot on top of the bacon and peas. Sprinkle your salt and pepper on top. Pour your broth and water over everything. No need to stir anything.

Cover and cook on low for 8-10 hours.
When it's all done cooking, you can either use a potato masher and mash the peas into oblivion or use a stick blender (my preference) to get a nice smooth soup.

Ideally, I'd like to serve this soup with deep fried croutons, but I didn't have any bread to make them from. Why deep fried? It keeps the croutons from getting soggy in your soup. A nice crusty bread is just as good, however!
And I won't pretend this doesn't have a lot of fat. It uses a whole pound of bacon, in case you hadn't noticed. I suppose, if you're scared of a little bacon, you'll just have to use the tried and true ham. But, bacon will win you brownie points with your husband. Just saying.
Wednesday, October 19, 2011
'Tis the Season to Knit
The weather is cooling down, the winds are picking up, the leaves are changing colors, and pumpkins are the latest in decor. For me, this means it's a more comfortable time to pick up the wool and needles and create loving pieces of yarnie goodness for my family and friends!
I joined a 1st Birthday Swap on Ravelry for Miriam's birth group, and I knit up a few things for a special little girl and her mommy. (Check out Lin's parenting blog at This Tiny Spark. She's just starting, but she's a wonderful writer and an even better mommy!)
Little Miss Maya is having a cupcake birthday, so I wanted to stay on that theme. Another mom made Maya a cupcake birthday skirt, so I made her a cupcake onesie to go with.
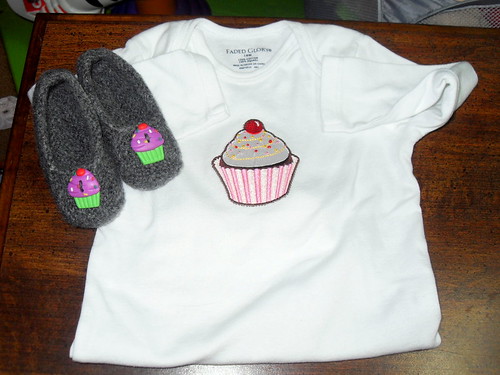
And to completely go cupcake overboard, I knit a pair of Duffers. This slipper pattern is fabulous! Here's my Ravelry project page.

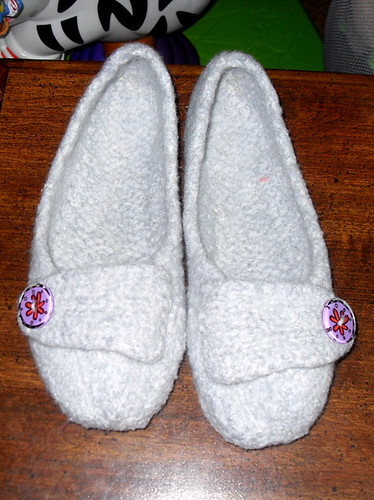
And a little something for momma: A pair of French Press Slippers. Details on my Ravelry project page.
I joined a 1st Birthday Swap on Ravelry for Miriam's birth group, and I knit up a few things for a special little girl and her mommy. (Check out Lin's parenting blog at This Tiny Spark. She's just starting, but she's a wonderful writer and an even better mommy!)
Little Miss Maya is having a cupcake birthday, so I wanted to stay on that theme. Another mom made Maya a cupcake birthday skirt, so I made her a cupcake onesie to go with.

And to completely go cupcake overboard, I knit a pair of Duffers. This slipper pattern is fabulous! Here's my Ravelry project page.

And a little something for momma: A pair of French Press Slippers. Details on my Ravelry project page.

Friday, August 26, 2011
How much money have I saved by breastfeeding?
I came across a post on Twitter where a mom claimed to have saved just over $2000 by breastfeeding instead of formula feeding. It got me to thinking...how much money have I saved by breastfeeding?
Let's start counting costs I've incurred while breastfeeding at the beginning, when I started nursing Benjamin. I worked out of the home for 6 months, and then have been home to feed him and Miriam ever since. I do not offer bottles when I am available to nurse, so Miriam has had a bottle offered only 1 time and she refused it. There's been no point in bottle-training her since I am a stay at home mom now, so I didn't push it:
Breastfeeding Introduction Class: offered for free by my birthing center = $0
Breastpump for returning to work: got a second-hand Medela PIS = $50
New tubing and flanges for pump: bought on clearance = $5 for tubing, $8 for flanges
Bottles: bought a 3 pack of Dr. Brown's bottles = $16
Bottlebrush: $5
Breastmilk storage bags: I used Lanisoh's Breastmilk Bags, an average of 1 pack per month for the 6 months I pumped = $60
Reuseable nursing pads: I made these myself or received them as promotional gifts = $0
Disposable nursing pads: These were thinner under my work clothes, used Lanisoh's brand, an average of 1 box/month for 2 years = $118
Nursing shawl: I purchased a fancy custom-made shawl I rarely use because I am comfortable nursing without a cover in public, but I didn't start out that way = $40
Benjamin did get a good amount of formula in those 6 months that I worked, to supplement what I couldn't pump. So if I factor in the 8 cans of Target brand Gentile Formula we used, it would add $118 to our feeding costs.
My total cost in breastfeeding my 2 children (with the small amount of formula supplementation) = $420
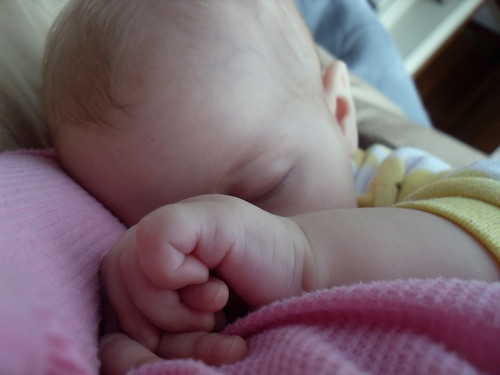
Morning nursing session in bed on a lazy Saturday
Now, if we had exclusively formula fed Benjamin, our formula costs would be much higher. I found an online chart that broke down the average amount of formula drunk per day, but it only accounted for up to 6 months of age. Because babies can begin to be offered solid foods at 6 months of age, I would assume that the average amount of formula consumed would stay constant from 6-12 months, with the additional calories needed ingested in the form of solid foods. According to this chart (which, when compared to other online charts, falls right in the middle of the low vs high amounts of formula per day), a child will consume roughly 11,490 ounces of formula in 1 year. The Up & Up brand of Gentle Formula (which was what Benjamin tolerated), costs $14.80 for 80 ounces. 11,490/80=143.625x$14.80 = $2,125.65 for a one year supply of powdered formula.
Miriam has a casein allergy, so she cannot have dairy products. She also likely has a soy allergy (very common in babies that have a CSM allergy) So, formula feeding her would require an elemental formula. These formulas are available to us by prescription only, but would not be covered by insurance. Each can retails at $32.98 and makes 80fl oz. Keeping with the same averages that we used in calculating Benjamin's formula cost, we would assume that Miriam would also take in roughly 11,490 ounces in one year. That's a total cost of $4,738.75 for a years worth of formula!
Add in cost of bottles = $16 (assuming we're cool with lots of washing and can work with 3 bottles in our cabinets)
Bottle brush = $5
Formula travel dispenser = $7
Total cost for formula feeding my 2 children for only one year each = $6,892.40
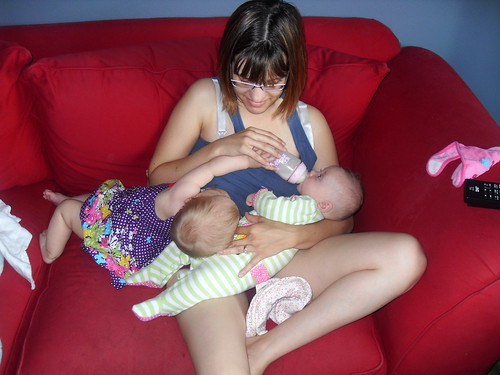
Nursing my daughter while formula feeding a nanny charge on yet another lazy Saturday morning
WOW! Look at that! I saved $6,472.40 by choosing to feed my child naturally by breastfeeding!! Of course, this doesn't take into account any of the potential medical savings for either my kids or myself (that's right, breastfeeding lowers my risk of common cancers!) over our lifetime.
These simple calculations mean a lot to me, considering that I initially chose to breastfeed purely for the monetary savings. Since then, the act of breastfeeding has developed to hold so much more meaning to me than frugality. As science attempts to create substitutes to rival Mother's Milk, it only furthers my education in how wonderful God made my body and how he designed it to nurture my children. No amount of money saved will ever compare to that!
Let's start counting costs I've incurred while breastfeeding at the beginning, when I started nursing Benjamin. I worked out of the home for 6 months, and then have been home to feed him and Miriam ever since. I do not offer bottles when I am available to nurse, so Miriam has had a bottle offered only 1 time and she refused it. There's been no point in bottle-training her since I am a stay at home mom now, so I didn't push it:
Breastfeeding Introduction Class: offered for free by my birthing center = $0
Breastpump for returning to work: got a second-hand Medela PIS = $50
New tubing and flanges for pump: bought on clearance = $5 for tubing, $8 for flanges
Bottles: bought a 3 pack of Dr. Brown's bottles = $16
Bottlebrush: $5
Breastmilk storage bags: I used Lanisoh's Breastmilk Bags, an average of 1 pack per month for the 6 months I pumped = $60
Reuseable nursing pads: I made these myself or received them as promotional gifts = $0
Disposable nursing pads: These were thinner under my work clothes, used Lanisoh's brand, an average of 1 box/month for 2 years = $118
Nursing shawl: I purchased a fancy custom-made shawl I rarely use because I am comfortable nursing without a cover in public, but I didn't start out that way = $40
Benjamin did get a good amount of formula in those 6 months that I worked, to supplement what I couldn't pump. So if I factor in the 8 cans of Target brand Gentile Formula we used, it would add $118 to our feeding costs.
My total cost in breastfeeding my 2 children (with the small amount of formula supplementation) = $420

Morning nursing session in bed on a lazy Saturday
Now, if we had exclusively formula fed Benjamin, our formula costs would be much higher. I found an online chart that broke down the average amount of formula drunk per day, but it only accounted for up to 6 months of age. Because babies can begin to be offered solid foods at 6 months of age, I would assume that the average amount of formula consumed would stay constant from 6-12 months, with the additional calories needed ingested in the form of solid foods. According to this chart (which, when compared to other online charts, falls right in the middle of the low vs high amounts of formula per day), a child will consume roughly 11,490 ounces of formula in 1 year. The Up & Up brand of Gentle Formula (which was what Benjamin tolerated), costs $14.80 for 80 ounces. 11,490/80=143.625x$14.80 = $2,125.65 for a one year supply of powdered formula.
Miriam has a casein allergy, so she cannot have dairy products. She also likely has a soy allergy (very common in babies that have a CSM allergy) So, formula feeding her would require an elemental formula. These formulas are available to us by prescription only, but would not be covered by insurance. Each can retails at $32.98 and makes 80fl oz. Keeping with the same averages that we used in calculating Benjamin's formula cost, we would assume that Miriam would also take in roughly 11,490 ounces in one year. That's a total cost of $4,738.75 for a years worth of formula!
Add in cost of bottles = $16 (assuming we're cool with lots of washing and can work with 3 bottles in our cabinets)
Bottle brush = $5
Formula travel dispenser = $7
Total cost for formula feeding my 2 children for only one year each = $6,892.40

Nursing my daughter while formula feeding a nanny charge on yet another lazy Saturday morning
WOW! Look at that! I saved $6,472.40 by choosing to feed my child naturally by breastfeeding!! Of course, this doesn't take into account any of the potential medical savings for either my kids or myself (that's right, breastfeeding lowers my risk of common cancers!) over our lifetime.
These simple calculations mean a lot to me, considering that I initially chose to breastfeed purely for the monetary savings. Since then, the act of breastfeeding has developed to hold so much more meaning to me than frugality. As science attempts to create substitutes to rival Mother's Milk, it only furthers my education in how wonderful God made my body and how he designed it to nurture my children. No amount of money saved will ever compare to that!
Friday, July 8, 2011
Getting my hair did
I have LOTS of stick straight fine hair. It's a serious torture device in the summer. The one summer that I spend all day everyday outside, the summer I worked at a camp for the mentally and physically disabled, I actually went so far as to shave my head. Maybe not the smartest choice as I was a bit regretting it come fall and my freshman year of college, but, Man! It was awesome for the summer! No more sweat rolling down my forehead and no more heat rashes on my neck. Every summer, I wish I could do that again, but then I am reminded of the pain in the butt inbetween styles I had to put up with, and I just don't want to deal with that again.
(The Before)
Also, please add in the fact that I have 2 young children and nanny for an additonal 3 young children. I have no time (or will) to take a shower most days, much less spend 5 minutes drying my hair. I had one very awesome stylist that was able to thin my hair out enough that it was manageable for me, but then she went and got married and then moved away. Geez! Why wasn't she thinking about me! Since then, I have suffered through 9 stylists who much up my hair everytime. Seriously, I've paid anywhere from $7 to $45 for a haircut and spent anywhere from 15 minutes to 3 hours in a stylist's chair with no one being able to replicate the results of this favorite stylist. So, I've decided to stop hating my hair and to stop making these poor girls try to fit in someone else's shoes. I'm going to do something totally different.
My requirements:
1) My hair must not hang on my neck
2) My hair must look good after 3 days of no showers
3) My hair maintenance must take less than 5 minutes a day and preferrably not require product of any sort
4) My hair must be versatile and be both a "mommy cut" and "smoking hot wife cut"
Idea: A permed bob. A cut that will create some volume so that my unwashed hair is not limp on my scalp. A style that won't require me to do anything to it but tossle dry on days that I don't have time, but allows for some more detailed styling on days that I really want to play with my hair.
So I brought these four pictures to my new stylist. Yeah, a big leap to hand over a more delicate process to someone brand new to me, but I haven't fallen in love with any of the other ladies that I've visited, so why not? I'm aware that one of these is not actually a perm or naturally curly hair, but rather a curled style, but these pictures were brought as a "please don't make me curlier than this" guide.


Okay, my stylist turned out to be super awesome at my hair! He wasn't much of a talker...as in didn't say two words to me at all, other than, "So you want a perm?" And it was kind of nice to sit in peace and quiet for once! I love the final result, and I think it's a super easy style. I told him I wanted "beachy," and I think that just about describes the tightness of the curl! In fact, you can actually see my (months old) highlights much better now.
(The After)
Do you love it too?
(The Before)

Also, please add in the fact that I have 2 young children and nanny for an additonal 3 young children. I have no time (or will) to take a shower most days, much less spend 5 minutes drying my hair. I had one very awesome stylist that was able to thin my hair out enough that it was manageable for me, but then she went and got married and then moved away. Geez! Why wasn't she thinking about me! Since then, I have suffered through 9 stylists who much up my hair everytime. Seriously, I've paid anywhere from $7 to $45 for a haircut and spent anywhere from 15 minutes to 3 hours in a stylist's chair with no one being able to replicate the results of this favorite stylist. So, I've decided to stop hating my hair and to stop making these poor girls try to fit in someone else's shoes. I'm going to do something totally different.
My requirements:
1) My hair must not hang on my neck
2) My hair must look good after 3 days of no showers
3) My hair maintenance must take less than 5 minutes a day and preferrably not require product of any sort
4) My hair must be versatile and be both a "mommy cut" and "smoking hot wife cut"
Idea: A permed bob. A cut that will create some volume so that my unwashed hair is not limp on my scalp. A style that won't require me to do anything to it but tossle dry on days that I don't have time, but allows for some more detailed styling on days that I really want to play with my hair.
So I brought these four pictures to my new stylist. Yeah, a big leap to hand over a more delicate process to someone brand new to me, but I haven't fallen in love with any of the other ladies that I've visited, so why not? I'm aware that one of these is not actually a perm or naturally curly hair, but rather a curled style, but these pictures were brought as a "please don't make me curlier than this" guide.


Okay, my stylist turned out to be super awesome at my hair! He wasn't much of a talker...as in didn't say two words to me at all, other than, "So you want a perm?" And it was kind of nice to sit in peace and quiet for once! I love the final result, and I think it's a super easy style. I told him I wanted "beachy," and I think that just about describes the tightness of the curl! In fact, you can actually see my (months old) highlights much better now.
(The After)

Do you love it too?
Thursday, July 7, 2011
Day 6, Tour de Fleece
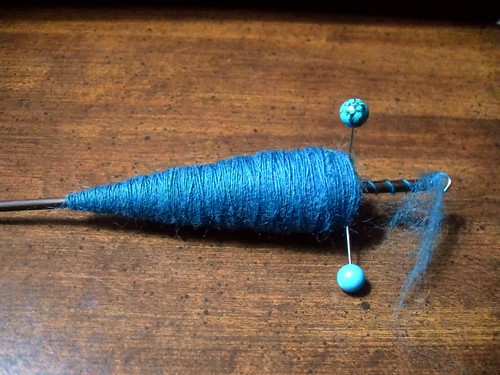
Miriam had a hard time falling asleep tonight, so I only got my 15 minutes in. It seemed to take forever though!

Wednesday, July 6, 2011
Day 5, Tour de Fleece
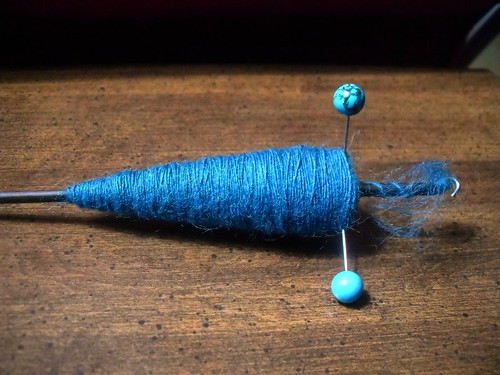
Things are slowing down! I spun for an hour today, but it was broken up into lots of 5 minute chunks throughout the day.

Tuesday, July 5, 2011
Day 4, Tour de Fleece
Day 4 finds me back at work. I nanny for 3 small children, in addition to watching my 2 babies, so spinning during the day has become impossible. That is the reason I set my goal for spinning 15 minutes a day! Today was a lot more thick and thin spinning than yesterday, but I was sort of rushing my drafting because I'm exhausted!
I was able to finish up what I couldn't spin yesterday. I take my roving length and split it into 4 strands. I had been spinning from all four strands the first 2 days, but yesterday and today, I only spun from two of them.

And to give you an idea of how fine my thread is, I've included this picture. When plied (twisting 2 spun threads onto each other to create a stable yarn), I should have a fingering weight yarn.
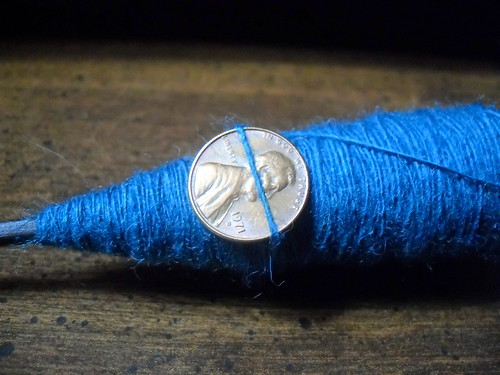
I'm getting sick of looking at all this turquoise. Are you? I better start thinking about what I want to knit from this yarn so that I'm motivated to keep spinning from this roving!
I was able to finish up what I couldn't spin yesterday. I take my roving length and split it into 4 strands. I had been spinning from all four strands the first 2 days, but yesterday and today, I only spun from two of them.

And to give you an idea of how fine my thread is, I've included this picture. When plied (twisting 2 spun threads onto each other to create a stable yarn), I should have a fingering weight yarn.

I'm getting sick of looking at all this turquoise. Are you? I better start thinking about what I want to knit from this yarn so that I'm motivated to keep spinning from this roving!
Monday, July 4, 2011
Day 3, Tour de Fleece
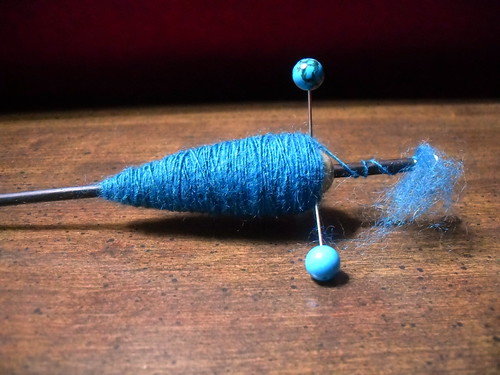
Day 3! I only got 1/2 as much done as I had the past two days, but I did spin twice my goal time. (For a reminder, my goal time is 15 minutes a day.) I'm so excited that I'm feeling more in control of my drafting! I'm still doing "park and draft" but at least it's becoming a consistent amount of fiber in each draft. Now, I need to work on being consistent in the timing of my draft. That will allow me to let go of the "park" and spin on a spindle like the pros!

Sunday, July 3, 2011
Day 2, Tour de Fleece
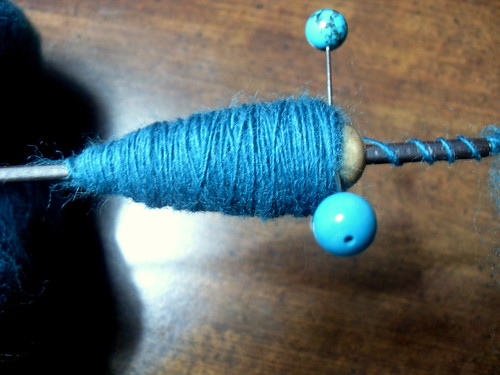
I actually got an hour to spin tonight! Well, I usually have that hour on a regular basis, it's just that I chose to use it for spinning instead of something else. I just about doubled the amount of fiber on the Trindle, and I am getting a more even and thin single. I bet by the end of this tour, my singles should look pretty passable!!

Saturday, July 2, 2011
Tour de Fleece
Well, the Tour de France has started today! However, in even more exciting news, the Tour de Fleece has started as well!! What? You've never heard of the Tour de Fleece? But it's only the most grueling and demanding spinning competition ever!
Okay, it's not grueling or demanding, unless you want it to be. You set your own goal, be it yardage, finished product, or time invested. You join teams based on your personal interests, your talent level, or your spinning instrument of choice. There's a huge group of spinners on Ravelry who are participating in the Tour de Fleece, like over 4300 huge!
I've joined Team Rookie (because I've been actively spinning for less than 1 year) and Team Trindle (because that's the type of spindle I've chosen to spin on). My goal is to spin a minimum of 15 minutes a day, with letting go of my "park and draft" method when we get to the mountain stages (same day the Tour de France does!). I'm hoping that by the end of this TdF, I'll be a more confident and even spinner, perhaps enough to justify more fiber purchases at the Wisconsin Sheep and Wool Festival in September!
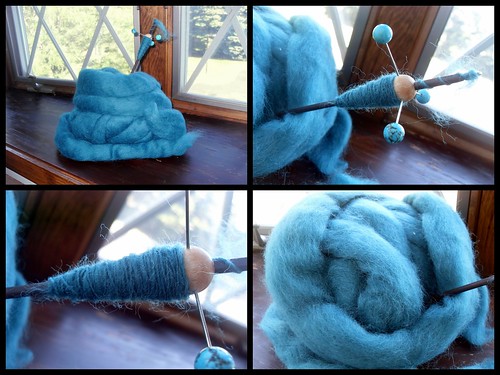
I am spinning from a turquoise 6oz Corriedale roving on a 13 gram Trindle.
Okay, it's not grueling or demanding, unless you want it to be. You set your own goal, be it yardage, finished product, or time invested. You join teams based on your personal interests, your talent level, or your spinning instrument of choice. There's a huge group of spinners on Ravelry who are participating in the Tour de Fleece, like over 4300 huge!
I've joined Team Rookie (because I've been actively spinning for less than 1 year) and Team Trindle (because that's the type of spindle I've chosen to spin on). My goal is to spin a minimum of 15 minutes a day, with letting go of my "park and draft" method when we get to the mountain stages (same day the Tour de France does!). I'm hoping that by the end of this TdF, I'll be a more confident and even spinner, perhaps enough to justify more fiber purchases at the Wisconsin Sheep and Wool Festival in September!

I am spinning from a turquoise 6oz Corriedale roving on a 13 gram Trindle.
Friday, July 1, 2011
Saturday, June 25, 2011
The Leftover Skirt
A bit ago, I picked up the most gorgeous 2 yards of linen I have every touched. It was mostly due to color, being a fabric woven with a light yellow-orange thread in one direction and a bright fuschia thread in the other. I had purchased it, meaning for it to become a linen ring sling. I washed the fabric, which turned gave a luxuriously soft hand and now made it a very easy to care for fabric! I made my sling by cutting the fabric in half lengthwise, leaving me with a piece of leftover linen that was 29" wide by 2 feet long. I thought about making a second sling from it to gift to someone else, but 2 yards makes for a really short sling and not many people are as small as I am to appreciate that. So I set it aside for some further thought.
Then, it came to me. A Skirt! I need a skirt. I'm not a woman who likes to wear shorts. I wear a lot of jeans and capris, and before becoming a breastfeeding momma, I wore a lot of dresses in the summer. (Needing to breastfeed at a moments notice, I no longer wish to wear one piece dresses as I prefer to lift my shirt from the bottom to nurse.) But, if the skirt is comfortable enough, casual enough, and long enough, I can chase kids in it!
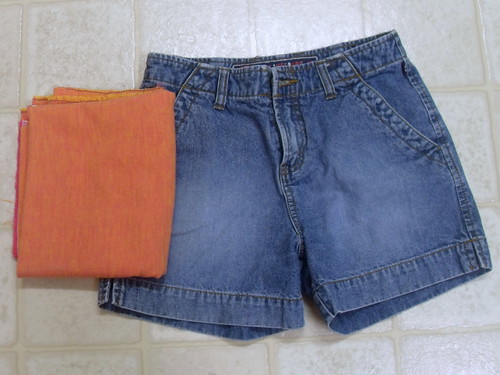
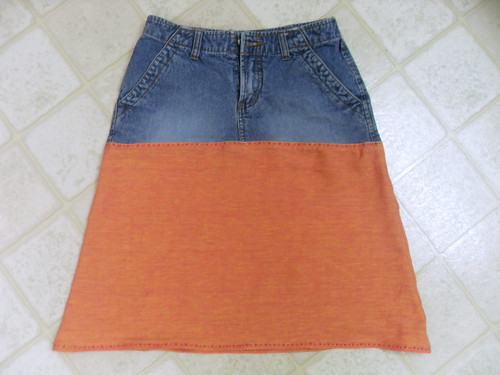
So I made my skirt, making it a more casual option by pairing it with a pair of jean shorts that didn't fit well in the crotch area anymore. I've gotten some good comments on it, as well as other moms wishing for the pattern, so I thought I'd put it out there for anyone interested!
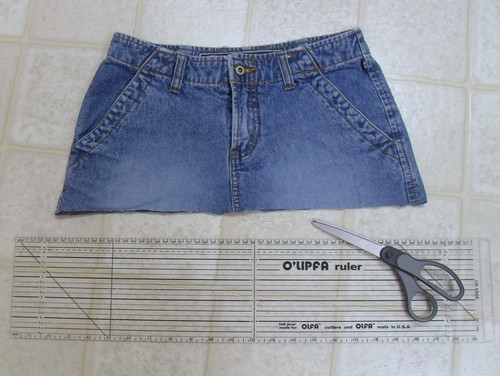
Step one: Cut the legs and crotch off the pants or shorts in a straight line from hip to hip. If you want to keep the back pockets on, you might want to turn the jeans over to make sure you're cutting below the pocket line.
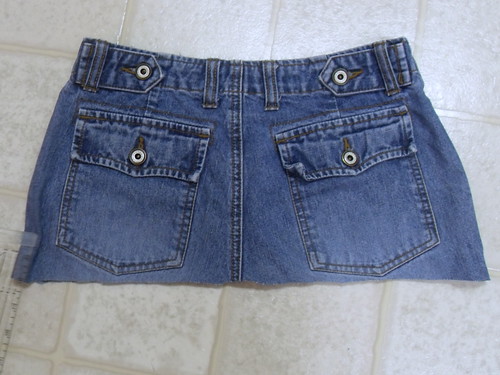
Step two: Measure the width of your jeans along the cut edge and add 1/2". As you can see, my jeans measured 18.5", so my number for this step is 19".
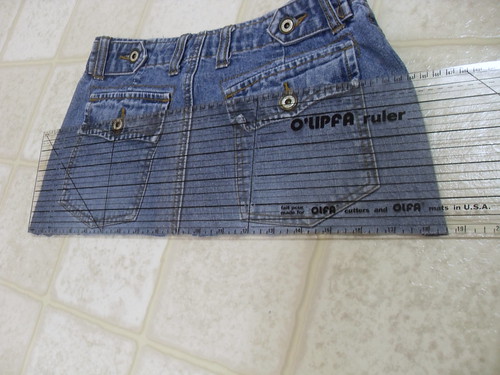
Step three: Draft your pattern. It's going to look like a trapezoid. Along the top, draw a line that equals your final number from step two (my line is 19" long). Measure 15" down from the line you just drew. Draw another line, perpendicular, that is 7" longer than your first line (so my bottom line is 26" long). Connect the two lines to create the trapezoid. Now, how did I come up with the 15" length? I put on my jean top and hung a measuring tape down from the cut edge to determine the length I wanted. I added 1" for seams.
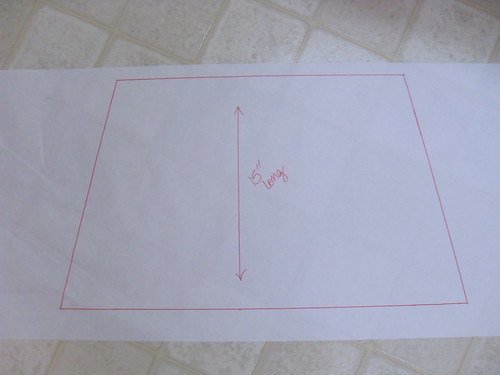
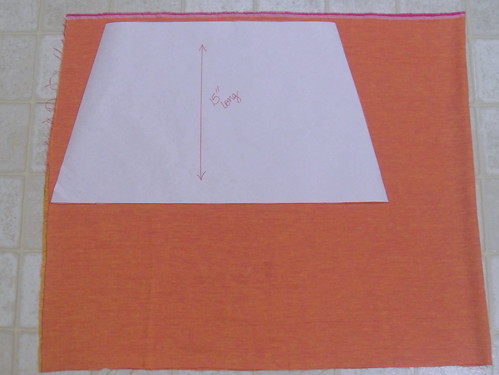
Step four: Cut your fabric using the pattern. Make sure you cut two pieces. I made my pattern on freezer paper. Did you know that you can iron the freezer paper onto your fabric so you can cut without needing pins or having your fabric shift? I just learned that on this project!
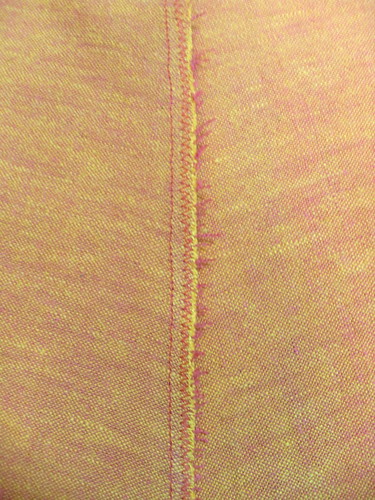
Step five: Sew your skirt side seams. With right sides together, stitch along the trapezoid sides with a 1/4" seam. Finish off the seam so the fabric doesn't unravel. I did a zigzag, but you could do an overcasting stitch.
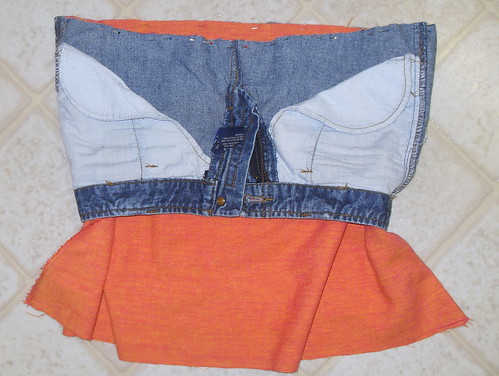
Step six: With right sides together, sew your fabric to your jeans along the short side, using a 1/2" seam. (Ummm...why yes, I did put right side to wrong side...and then I had to unpick the seam and do it again.)
Step seven: Hem your skirt with a 1/2" folded hem. (Fold up 1/4" inch, press, and then fold up another 1/4" inch and press.)
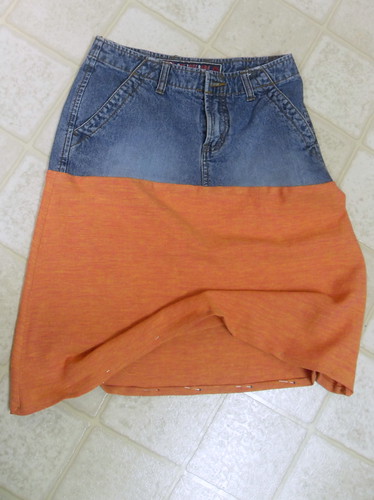
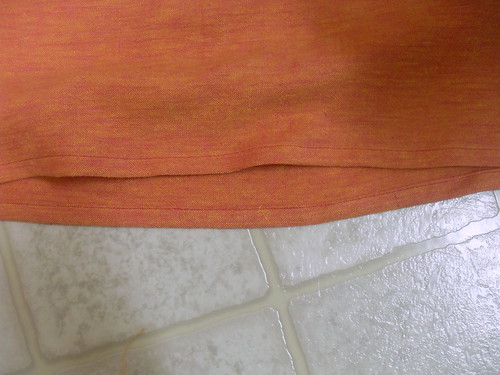
Step eight: You need to finish the raw edge of the fabric where it meets the jeans, to avoid the seams unraveling. I chose to do a decorative top stitch, catching the jeans and the fabric in the stitching. I also did it along the bottom hem.
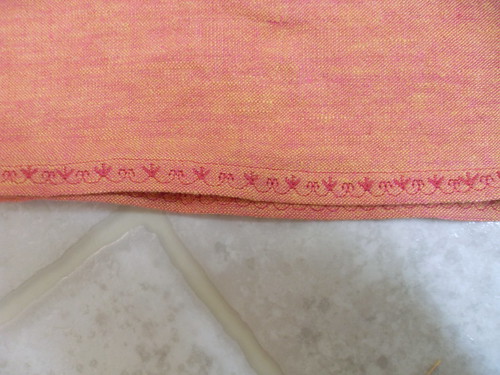
(Detail of the decorative embroidery stitch)
Ta-da! All done!
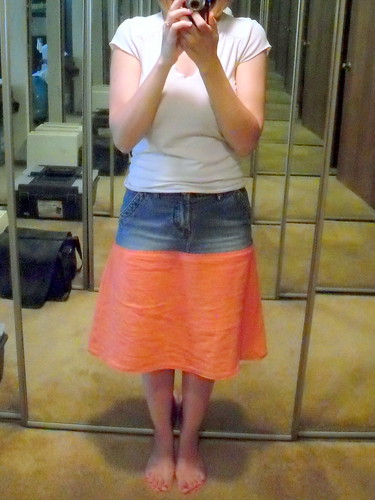
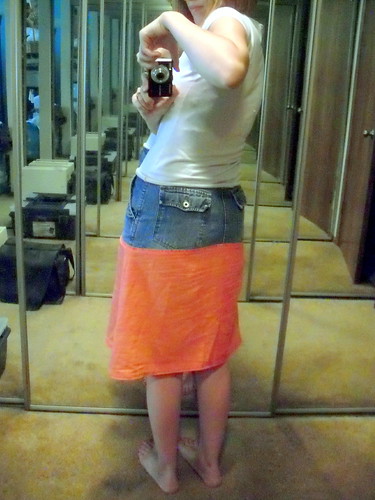
And I wore it, paired with the sling made of the same fabric. Unfortanately, I was standing funny and didn't think to check the side seams of the skirt in this picture!
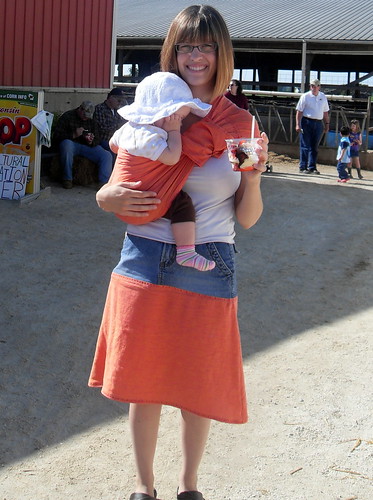
Then, it came to me. A Skirt! I need a skirt. I'm not a woman who likes to wear shorts. I wear a lot of jeans and capris, and before becoming a breastfeeding momma, I wore a lot of dresses in the summer. (Needing to breastfeed at a moments notice, I no longer wish to wear one piece dresses as I prefer to lift my shirt from the bottom to nurse.) But, if the skirt is comfortable enough, casual enough, and long enough, I can chase kids in it!

So I made my skirt, making it a more casual option by pairing it with a pair of jean shorts that didn't fit well in the crotch area anymore. I've gotten some good comments on it, as well as other moms wishing for the pattern, so I thought I'd put it out there for anyone interested!

Step one: Cut the legs and crotch off the pants or shorts in a straight line from hip to hip. If you want to keep the back pockets on, you might want to turn the jeans over to make sure you're cutting below the pocket line.

Step two: Measure the width of your jeans along the cut edge and add 1/2". As you can see, my jeans measured 18.5", so my number for this step is 19".

Step three: Draft your pattern. It's going to look like a trapezoid. Along the top, draw a line that equals your final number from step two (my line is 19" long). Measure 15" down from the line you just drew. Draw another line, perpendicular, that is 7" longer than your first line (so my bottom line is 26" long). Connect the two lines to create the trapezoid. Now, how did I come up with the 15" length? I put on my jean top and hung a measuring tape down from the cut edge to determine the length I wanted. I added 1" for seams.

Step four: Cut your fabric using the pattern. Make sure you cut two pieces. I made my pattern on freezer paper. Did you know that you can iron the freezer paper onto your fabric so you can cut without needing pins or having your fabric shift? I just learned that on this project!

Step five: Sew your skirt side seams. With right sides together, stitch along the trapezoid sides with a 1/4" seam. Finish off the seam so the fabric doesn't unravel. I did a zigzag, but you could do an overcasting stitch.

Step six: With right sides together, sew your fabric to your jeans along the short side, using a 1/2" seam. (Ummm...why yes, I did put right side to wrong side...and then I had to unpick the seam and do it again.)

Step seven: Hem your skirt with a 1/2" folded hem. (Fold up 1/4" inch, press, and then fold up another 1/4" inch and press.)


Step eight: You need to finish the raw edge of the fabric where it meets the jeans, to avoid the seams unraveling. I chose to do a decorative top stitch, catching the jeans and the fabric in the stitching. I also did it along the bottom hem.

(Detail of the decorative embroidery stitch)

Ta-da! All done!


And I wore it, paired with the sling made of the same fabric. Unfortanately, I was standing funny and didn't think to check the side seams of the skirt in this picture!

Subscribe to:
Posts (Atom)

