Showing posts with label sewing. Show all posts

Saturday, June 25, 2011

The Leftover Skirt

A bit ago, I picked up the most gorgeous 2 yards of linen I have every touched. It was mostly due to color, being a fabric woven with a light yellow-orange thread in one direction and a bright fuschia thread in the other. I had purchased it, meaning for it to become a linen ring sling. I washed the fabric, which turned gave a luxuriously soft hand and now made it a very easy to care for fabric! I made my sling by cutting the fabric in half lengthwise, leaving me with a piece of leftover linen that was 29" wide by 2 feet long. I thought about making a second sling from it to gift to someone else, but 2 yards makes for a really short sling and not many people are as small as I am to appreciate that. So I set it aside for some further thought.

Then, it came to me. A Skirt! I need a skirt. I'm not a woman who likes to wear shorts. I wear a lot of jeans and capris, and before becoming a breastfeeding momma, I wore a lot of dresses in the summer. (Needing to breastfeed at a moments notice, I no longer wish to wear one piece dresses as I prefer to lift my shirt from the bottom to nurse.) But, if the skirt is comfortable enough, casual enough, and long enough, I can chase kids in it!

shorts and fabric

So I made my skirt, making it a more casual option by pairing it with a pair of jean shorts that didn't fit well in the crotch area anymore. I've gotten some good comments on it, as well as other moms wishing for the pattern, so I thought I'd put it out there for anyone interested!

cut off legs - front

Step one: Cut the legs and crotch off the pants or shorts in a straight line from hip to hip. If you want to keep the back pockets on, you might want to turn the jeans over to make sure you're cutting below the pocket line.

cut off legs - back

Step two: Measure the width of your jeans along the cut edge and add 1/2". As you can see, my jeans measured 18.5", so my number for this step is 19".

measure width of jean bottom

Step three: Draft your pattern. It's going to look like a trapezoid. Along the top, draw a line that equals your final number from step two (my line is 19" long). Measure 15" down from the line you just drew. Draw another line, perpendicular, that is 7" longer than your first line (so my bottom line is 26" long). Connect the two lines to create the trapezoid. Now, how did I come up with the 15" length? I put on my jean top and hung a measuring tape down from the cut edge to determine the length I wanted. I added 1" for seams.

draft skirt

Step four: Cut your fabric using the pattern. Make sure you cut two pieces. I made my pattern on freezer paper. Did you know that you can iron the freezer paper onto your fabric so you can cut without needing pins or having your fabric shift? I just learned that on this project!

lay out on fabric

Step five: Sew your skirt side seams. With right sides together, stitch along the trapezoid sides with a 1/4" seam. Finish off the seam so the fabric doesn't unravel. I did a zigzag, but you could do an overcasting stitch.

sew side seams and finish

Step six: With right sides together, sew your fabric to your jeans along the short side, using a 1/2" seam. (Ummm...why yes, I did put right side to wrong side...and then I had to unpick the seam and do it again.)

attach skirt to jeans

Step seven: Hem your skirt with a 1/2" folded hem. (Fold up 1/4" inch, press, and then fold up another 1/4" inch and press.)

sew a 1/2" double hem

double hem

Step eight: You need to finish the raw edge of the fabric where it meets the jeans, to avoid the seams unraveling. I chose to do a decorative top stitch, catching the jeans and the fabric in the stitching. I also did it along the bottom hem.

embellish with machine embroidery

(Detail of the decorative embroidery stitch)
detail of machine embroidery

Ta-da! All done!
leftover skirt - front

leftover skirt - back

And I wore it, paired with the sling made of the same fabric. Unfortanately, I was standing funny and didn't think to check the side seams of the skirt in this picture!

Leftover skirt + ring sling

Wednesday, January 5, 2011

BabyLegs

Well, guess who found some time?! I got a new babycarrier in the mail, so I plopped Miriam in and was able to get some handsfree time as long as I kept moving. A little dancing around the sewing machine, and I created some DIY BabyLegs!!

I took a pair of $2.00 knee socks from the women's department at Target.
SDC14947

Cut off the toes and heels
SDC14948

Folded the foot portion in half, wrong sides together to create a cuff
SDC14949

Slipped the leg portion into the cuff so that all three raw edges matched
SDC14950

Sewed a zigzag (tension set at length = 2.0, width = 3.0, slightly stretching the fabric as I sewed) at a 1/4 inch seam along the raw edges and flipped the cuff down so the seam was inside
SDC14952

And put them on my baby with her onsie that Aunt Sarah decorated for her!
SDC14955


Super super easy to do. Perfect for babywearing since their pants get hiked up so far in a carrier!

Tuesday, January 4, 2011

Ideas, Ideas, Ideas

I have loads of ideas. I have no time to implement them. This makes me sad. :-(

Sewing:
BabyLegs
a dupioni silk ring sling
several bloomers for Miriam
make a Duck Tape Dress Form for myself

Knitting
finish my Central Park Hoodie
make Chris a reinforced pair of socks since he already wore a hole in the pair of socks I gave him for Christmas last year. :-)
both the kids need new hats. Wish their heads would take a break on growing so fast!
I need 3 or 4 more pairs of socks for myself in order to be able to wear handknit socks everyday. :-)
Miriam needs her own Christmas stocking!

Other Crafting
I want to create a trio of modern paintings to hang over our couch in the living room.
I need some form of keepsakes for Benjamin's and Miriam's current sizes. Ideas?
I want to create a mirror window in our dining room to help bring more light in.
need to hang the picture wall...as soon as I decide which wall that will be!

And of course, the house
the wallpaper needs to finish coming off.
the kitchen ceiling needs to be redone...as soon as the lighting can be rearranged (take down the chandelier, turn the fan into one that contains a light, take down the flourescent lights and turn them into recessed lighting)
then the kitchen cabinets need to be repainted and the walls too
the carpet needs to be taken up and new flooring laid down.

That seems like it should be enough work, doesn't it? Now, where to find the time?!

Sunday, July 4, 2010

Infant/Toddler Pillowcase Dress

Infant Sundress Tutorial - materials
Materials:
2 pieces of 18” x 16.5” cotton fabric (I used two fat quarters for this dress)
14” of 1/2” knit elastic
1 package of 1/2” double fold bias tape (great tutorial here!!)
matching thread

Normally, one would use a pretty patterned, embroidered, or vintage pillowcase to make this dress. However, I wanted to make my daughter a dress that would match Mommy's dress, and I certainly couldn't fit into a pillowcase! You can still use a pillowcase if you would like, but just ignore steps 2-3 since the pillowcase will already have that completed for you. (When measuring the 18” on your pillowcase, use the opening as the bottom of your dress. Then you won't need to hem!) This dress should fit from 6 months – 18 months (finished length is 16.25”).

Step 1:
Infant Sundress Tutorial - cut fabric Infant Sundress Tutorial - armhole template
(click on each picture for a bigger view.)
Lay the two pieces of fabric on top of each other, right sides together, and cut edges matched (or turn your pillowcase inside out). Fold the fabric in half lengthwise. Lay the armscye (armhole) template on the upper right-hand corner of the fabric, and cut along the j-shape to create armholes. Below is the template. It can also be found here on my Flickr page. Download and print the Medium(640) size. (I added 1" to the top and 5/8" to the side of my template after printing but before cutting so that I didn't have to measure once placed on my fabric.)

Armscye template for infant pillowcase dress

Step 2:
Infant Sundress Tutorial - armholes cut Infant Sundress Tutorial - side seams trimming
Unfold the fabric. With right sides together, pin along the side edges (from the bottom of the “J” down). Sew a 5/8” straight seam. Go back and sew another straight seam in the seam allowance, 1/4” from the first one. Trim your fabric close to the second seam. Do this for each side. Press seams flat towards the back (which side is the back is completely up to you).

Step 3:
Infant Sundress Tutorial - hemming Infant Sundress Tutorial - hems
Hem your dress. Fold your fabric up 3/4” inch and press. Fold the raw edge down towards the pressed seam, hiding the raw edge on the inside, and press again. Stitch a straight seam 1/4” from the bottom of the dress. Stitch a second straight seam 1/8” above the first.

Step 4:
Infant Sundress Tutorial - step 1 on casing Infant Sundress Tutorial - step 2 on casing Infant Sundress Tutorial - casing
Create your top casing. Along the top of the dress, fold down 1/4” of the fabric and press. Fold down an additional 3/4” of the fabric and press. Sew a straight seam 1/8” from the edge of bottom press (leaving a tube-like hole above it). Do this for both the front and back pieces.

Step 5:
Infant Sundress Tutorial - elastic in casing Infant Sundress Tutorial - casing sewn shut
Cut your elastic in half so you have two 7” pieces. Using a safety pin for help, guide one piece of elastic through each casing. Leave 1/4” of elastic hanging out each side, and pin. Sew down the side of the casing, tacking in the elastic. To remove extra bulk, stretch the elastic ends and clip near the fabric.

Step 6:
Infant Sundress Tutorial - pinning bias tape Infant Sundress Tutorial - bias tape sewn on
Cut two 26” strips of bias tape. Find the midpoint of each piece and pin to the dress armscyes at the seam under the armpit. Place as many pins as you need to in order to attach the bias tape smoothly to the armholes. There will be around 10” or so of bias tape hanging from the top of the dress. This extra bias tape will become the shoulder ties. Starting at one end of the bias tape, stitch along the open edge, continuing through the armscye and up the other side. Repeat this on the other armhole. (I found an invaluable video tutorial on how to sew bias tape. Without it, there may have been lots of swearing. Not good for toddler ears.)

Step 7:
Infant Sundress Tutorial - finished
Put this nifty little dress on your favorite little girl! Tada! Beautifully (and safely) made!

Infant Sundress Tutorial - finished

Sometimes, you just have to give in...

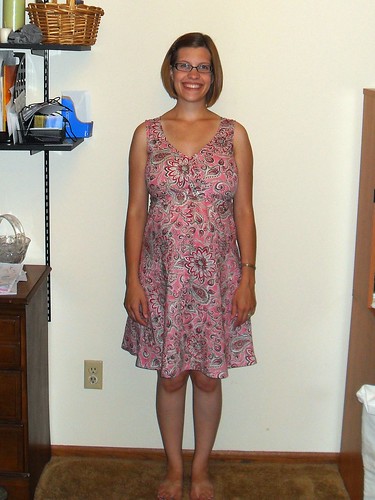
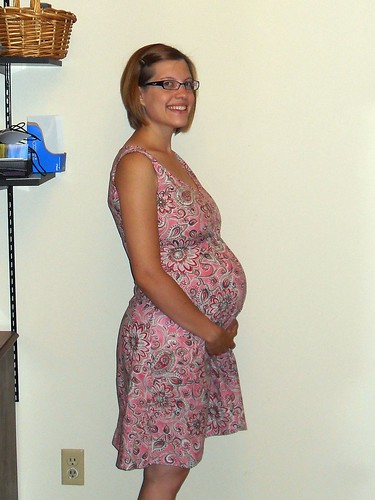
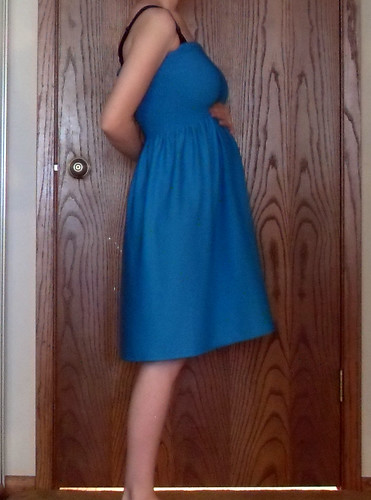
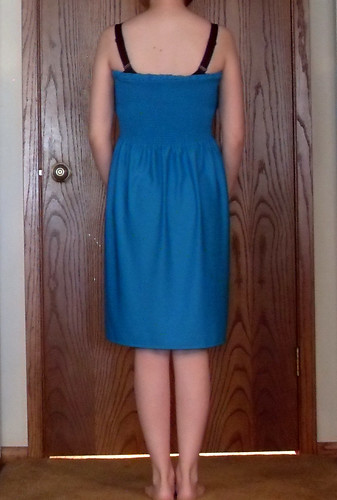
I finished a summer (maternity) dress for myself this morning. I haven't sewn any clothing for myself while using a pattern since I hit puberty, so I'm still learning how to fit for me. I should have added at least 2" to the bust area because my boobs pull the back so far forward that the armholes cut a bit into the back of my arms, and the boobs are a bit squished in there. Pattern is McCalls m6074.


(Yes, this is me at 28 weeks pregnant! I'm in the home stretch!)


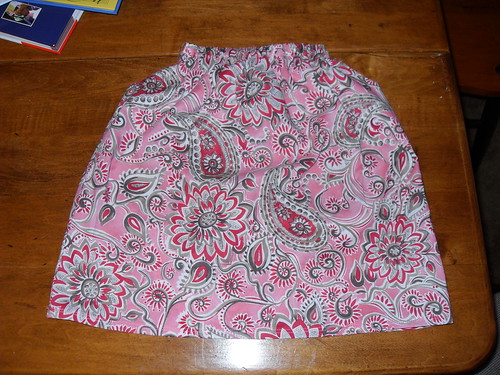
Then, because I had about 2 feet of fabric left, I decided to make my gestating daughter a matching dress. I made a pillowcase style dress, but without the drawstring. I didn't want her to get a shoulder strap caught on something and end up choking herself! So I put some 1/2" elastic in the casing instead. I've got to run to the store and pick up some bias tape binding, which I'm going to put around the armholes and use that for the shoulder ties. I hope to find some matching fabric to make bloomers out of too! This dress is suggested to fit 6 months to 18 months (though likely as a shirt by 18 months).


(Tutorial to follow when the dress is all finished!)

Monday, May 17, 2010

How to Make a Shirred Sundress: The Instructions

Okay, you've done your measuring. You've done your fabric shopping. You've even prepared your fabric. So...what are you waiting for?!?!

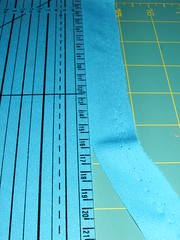
Lay your fabric out on the table or other hard surface, and drag out your measuring tape. (You'll notice that I am using a cutting mat for guiding my cuts. If you are using a patterned fabric, you probably won't need to use one for your cuts as you can use your pattern to guide you.)


Step 1: Start by cutting off the top salvage end. The salvage is the place where the fabric threads were strapped onto the loom. Unless it's a very pretty salvage (most aren't), you'll want to cut them off.

Step 2: Measure from the top of your fabric to the length you want your dress to be. For me this is 44" + 1" for seam allowances. Make your second cut along the bottom of the fabric.

Step 3: Lining up your first two cuts, square off one end of the fabric to make it start looking like a rectangle.

Step 4: Measure from your last cut across the fabric to the width you need for your dress. (Bust measurement x 2. This is 56" for me.) Make your final cut at this measurement to turn your fabric into a rectangle with right angles.

All your cutting is done! Set aside any fabric scraps you have for making the straps. Now break out that iron, and let's create the skeleton of our dress!

Do these Steps 1-5 for both the top and bottom edges of your fabric.
Step 1: Lay the fabric wrong side up. Using your Seam Guide, fold up the edge of the fabric 1/2" and pin into place. Do this the entire length of the fabric.

Step 2: Using the appropriate setting on your iron, press your fabric to make a nice crease along the fold line.

Step 3: Removing pins along the way, fold up the pressed edge of the fabric another 1/2" and pin back into place. This will hide the "raw" edges of your fabric so that it doesn't fray.

Step 4: Go back to your iron and press this new fold into a nice crease.

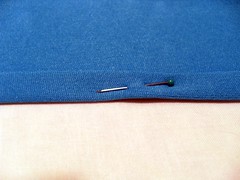
Step 5: Start up your sewing machine. Using fabric matching thread in both the top spool and the bobbin, sew a straight stitch 1/4" along the edge of your fabric (this stitch should fall right in the middle of your creased hem fold.). Make sure you backstitch at the beginning and ending of your seam so that the thread doesn't pull out.

Step 6: With right sides together, fold your fabric in half, matching the two remaining raw edges, and pin together.

Step 7: Seam 1/2" from the raw edges.


Step 8: Head back to your iron and press the seam open.

Now you have 2 hemmed edges; this is the top and the bottom of the dress. And your dress will also now be a tube. Step back and admire the beautiful seams that you have created. Make your husband admire. Dance around the living room with your toddler. Be so rediculously proud of your half-done creation that your family thinks you've jumped off the deep end. :-)

Now, let's work on shirring. Shirring is the technique of using elastic thread to create a stretchy gathered fabric. Each machine is a little fussy with elastic thread, so if these instructions don't work for you, do a little Google search on "name of sewing machine - elastic thread." Chances are someone has tried it with your machine. If you can't find any instructions, leave a comment with the type of machine you have and I'll see if I can guide you. I've used both an old machine with a bobbin case and this new computerized, drop-in bobbin machine that has a specific elastic stitch. Practice these next steps on some scrap fabrics until it looks the way you want it to!


Step 1: Wind the elastic thread into your bobbin. You will want to do this by hand. Make sure that the thread isn't pulled tight that it's stretched out, but isn't so loose so that it's falling off the bobbin. Plop the bobbin into place, and, if you have a drop-in bobbin like me, make sure the elastic thread is running through the bobbin tension disks. Continue to use the fabric matching thread on your top spool.

Step 2: Lengthen your straight stitch to 3.5-4mm. Also, if you don't have automatic tension, set it to 4. (REMEMBER: Practice, practice, practice!! You certainly want to make sure this looks right before you go ahead and sew on your dress. Remember you will loose approximately 1/2 your fabric width because of the elastic. Also, your elastic thread should be smoothly sewn along the back. Adjust the bobbin tension if you don't think it looks right.)

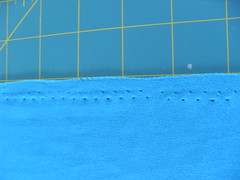
Step 3: Putting your needle down in the middle of your side seam, sew your first shirred line 1/4" from the top of your fabric edge. (This is right on top of your hem seam. Because of this, you may choose to seam your hem with the elastic thread right from the beginning.) You may, or may not, choose to backstitch your elastic stitch. If not, leave at least 1" of elastic thread, and knot the ends together so that it does not slip through your stitching and become loose. I chose to backstitch 3 stitches.

Step 4: Stretching the fabric out so it lays flat (which is really stretching the elastic thread, not pulling the fabric out of shape), sew your next line of elastic stitching 1/4" from the first line of stitching.

Step 5: Continue sewing lines of elastic stitching, each 1/4" apart, until you have enough to cover your bust length (Measurement B). I have stitched until I reached 9" from the top hem.

Yay!! You have shirred!! You will notice that with each additional line of elastic stitching, your fabric gathers more and more. It should remain stretchy, enough so to go around your bust. Now, for the last and final step...

Step 1: With your dress on, measure from the top in the front to the top in the back. This tells you how long your straps need to be.

Step 2: Cut your fabric to double your strap width plus 1". For me, I wanted 2" straps, so I would cut it 3" wide. And cut it to the length you want, plus 2". I wanted 10" long, so I cut a 12" long strip. Cut 2 strips, one for each strap.

Step 3: With right sides facing, pin the raw edges together along the long edge and one short edge.

Step 4: Seam 1/2" from the edge, along the long side and one short side, leaving the other short side open.

Step 5: Turn the strap right side out. Head back to your iron and press the seams flat.

Step 6: Turn in the raw edge of the unfinished short end and press 1/2" of the raw edge to the inside of the strap.

Step 7: Slip stitch the open end closed.

Step 8: Attach the strap to the top of the dress in both the front and the back. Sew a 1/4" seam, placing stitches in the hem of the dress. (That's 1/4" from the edge of the strap and 1/4" from the edge of the dress top.)

TaDa!! Try your dress on!


Now you are absolutely all done. I'm not sure I'm actually put on the staps. I don't know if the style really fits large chested women like me. It does fit nicely as a maternity skirt (you can do the same technique, but with less rows of shirring, just enough to create a waist). Tell me what you think!

Here are few sites that I found that helped me figure out the shirring and elastic thread thing. Review them if you're having trouble!
Pretty Ditty Shirring Tutorial
ThreadBanger Shirred Summer Dress

Sunday, May 16, 2010

How to Make a Shirred Sundress: The Fabric

I love to feel fabric. My mother used to take us along to the fabric store, and my brothers and I would look through the pattern books and run up and down the aisles, hands out and feeling the fabrics. When I pick a fabric, I pick first based on feel, second on color, and third on washing care. Of course, most times you do also have to pay attention to the fiber content and weave of the fabric, but you will find that even a 100% cotton fabric has varying feels and textures within that grouping.

For this project, if you are a brand new, novice sewer, please stick to a 100% cotton fabric with little to no stretch (pull both vertically and horizontally...every fabric has a little stretch diagonally). If you are more comfortable with different types of fabric, you can venture over to the cotton knits and jersey knits, maybe with a little spandex woven in. Because I am pregnant, and unable to predict just how large I will get, I have chosen a jersey knit with 10% spandex added.

When looking at colors and patterns, keep in mind that you will not be laying a pattern piece over your fabric. For newer sewers, you'll probably find it handy to choose something with a pattern that you can use as your cutting guide. Or, if you choose a solid color or difficult to follow pattern, you might use a cutting mat and rotary knife to help you cut a straight line.

So now you know what type of fabric you want. Let's look at dimensions and how much to purchase.

Fabric bolts have a sticker on their top telling you all about the fabric. It tells you fabric content (i.e. 100% cotton), how much total fabric is on the bolt (i.e. 8 yards), how to care for the fabric (i.e. machine wash warm, tumble dry low), and the fabric width (i.e 45 inches). When you pick a fabric to purchase, always take note of how to care for your fabric. Write it down or take a picture. You don't want to ruin a new project with the first wash!!

Let's go back to your dimensions. What is your Measurement C? This is how long you wanted your dress to be. If you want a 36" long dress, you certainly don't want to purchase a fabric that is only 28" wide. You would, at most, get a 27" long dress. So, now look for a fabric bolt that has at least 3" more in width than you want the length of your dress.

Now take your bust measurement (Measurement A) and multiply it by 2. This is how much fabric you will need to purchase from the bolt. For me, A x 2 = 56", or just over 1.5 yards, so I just asked the saleswoman to cut 2 yards. You also will need to realize that when the fabric is folded on the bolt, it very often isn't exactly equal. You may want to purchase at least 6" extra in order to square off your fabric. Otherwise you may find that at the top of the fabric, you have 60", while at the bottom you have 64" and you need 62".


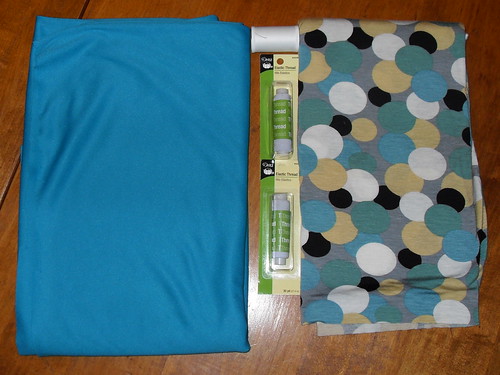
For this project, I bought 2 yards of 60" wide jersey knit fabric. I want an ankle length dress. I also bought what was left of a patterned jersey knit bolt to make my scrawny, can-never-find-anything-appropriate-in-the-stores niece. That was about 1.38 yards of 42" wide fabric.

Also, purchase some elastic thread. Each of the spools shown contains 30 yards of elastic thread. I used up nearly a whole spool just in my practice, so I do recommend getting two right away. You'll also need thread in a color to match your fabric.

Bring your fabric home, and give it a good wash and dry. This will loosen the fibers and they will fall into their place. If you don't wash your fabric prior to cutting and sewing, cotton especially, your first wash will shrink your finished project and likely pull on the grain of the fabric, leaving you a mess that you'll probably never wear again! Then, iron your fabric according to the instructions on the bolt. If your fabric is wrinkly, your cuts won't be straight.

Next: Cutting the Fabric and Sewing the Dress!