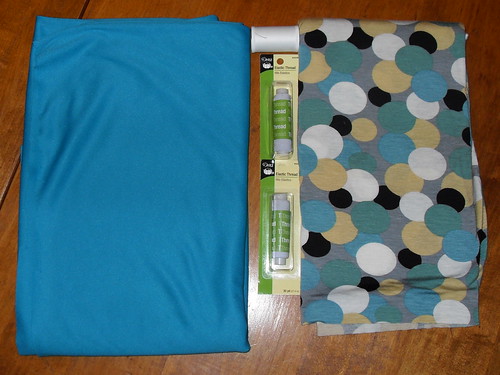
Lay your fabric out on the table or other hard surface, and drag out your measuring tape. (You'll notice that I am using a cutting mat for guiding my cuts. If you are using a patterned fabric, you probably won't need to use one for your cuts as you can use your pattern to guide you.)

Step 1: Start by cutting off the top salvage end. The salvage is the place where the fabric threads were strapped onto the loom. Unless it's a very pretty salvage (most aren't), you'll want to cut them off.
Step 2: Measure from the top of your fabric to the length you want your dress to be. For me this is 44" + 1" for seam allowances. Make your second cut along the bottom of the fabric.
Step 3: Lining up your first two cuts, square off one end of the fabric to make it start looking like a rectangle.
Step 4: Measure from your last cut across the fabric to the width you need for your dress. (Bust measurement x 2. This is 56" for me.) Make your final cut at this measurement to turn your fabric into a rectangle with right angles.
All your cutting is done! Set aside any fabric scraps you have for making the straps. Now break out that iron, and let's create the skeleton of our dress!
Do these Steps 1-5 for both the top and bottom edges of your fabric.
Step 1: Lay the fabric wrong side up. Using your Seam Guide, fold up the edge of the fabric 1/2" and pin into place. Do this the entire length of the fabric.
Step 2: Using the appropriate setting on your iron, press your fabric to make a nice crease along the fold line.
Step 3: Removing pins along the way, fold up the pressed edge of the fabric another 1/2" and pin back into place. This will hide the "raw" edges of your fabric so that it doesn't fray.
Step 4: Go back to your iron and press this new fold into a nice crease.
Step 5: Start up your sewing machine. Using fabric matching thread in both the top spool and the bobbin, sew a straight stitch 1/4" along the edge of your fabric (this stitch should fall right in the middle of your creased hem fold.). Make sure you backstitch at the beginning and ending of your seam so that the thread doesn't pull out.
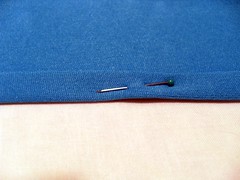
Step 6: With right sides together, fold your fabric in half, matching the two remaining raw edges, and pin together.
Step 7: Seam 1/2" from the raw edges.

Step 8: Head back to your iron and press the seam open.
Now you have 2 hemmed edges; this is the top and the bottom of the dress. And your dress will also now be a tube. Step back and admire the beautiful seams that you have created. Make your husband admire. Dance around the living room with your toddler. Be so rediculously proud of your half-done creation that your family thinks you've jumped off the deep end. :-)
Now, let's work on shirring. Shirring is the technique of using elastic thread to create a stretchy gathered fabric. Each machine is a little fussy with elastic thread, so if these instructions don't work for you, do a little Google search on "name of sewing machine - elastic thread." Chances are someone has tried it with your machine. If you can't find any instructions, leave a comment with the type of machine you have and I'll see if I can guide you. I've used both an old machine with a bobbin case and this new computerized, drop-in bobbin machine that has a specific elastic stitch. Practice these next steps on some scrap fabrics until it looks the way you want it to!

Step 1: Wind the elastic thread into your bobbin. You will want to do this by hand. Make sure that the thread isn't pulled tight that it's stretched out, but isn't so loose so that it's falling off the bobbin. Plop the bobbin into place, and, if you have a drop-in bobbin like me, make sure the elastic thread is running through the bobbin tension disks. Continue to use the fabric matching thread on your top spool.
Step 2: Lengthen your straight stitch to 3.5-4mm. Also, if you don't have automatic tension, set it to 4. (REMEMBER: Practice, practice, practice!! You certainly want to make sure this looks right before you go ahead and sew on your dress. Remember you will loose approximately 1/2 your fabric width because of the elastic. Also, your elastic thread should be smoothly sewn along the back. Adjust the bobbin tension if you don't think it looks right.)
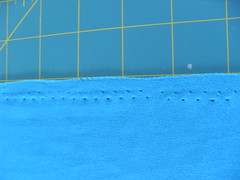
Step 3: Putting your needle down in the middle of your side seam, sew your first shirred line 1/4" from the top of your fabric edge. (This is right on top of your hem seam. Because of this, you may choose to seam your hem with the elastic thread right from the beginning.) You may, or may not, choose to backstitch your elastic stitch. If not, leave at least 1" of elastic thread, and knot the ends together so that it does not slip through your stitching and become loose. I chose to backstitch 3 stitches.
Step 4: Stretching the fabric out so it lays flat (which is really stretching the elastic thread, not pulling the fabric out of shape), sew your next line of elastic stitching 1/4" from the first line of stitching.
Step 5: Continue sewing lines of elastic stitching, each 1/4" apart, until you have enough to cover your bust length (Measurement B). I have stitched until I reached 9" from the top hem.
Yay!! You have shirred!! You will notice that with each additional line of elastic stitching, your fabric gathers more and more. It should remain stretchy, enough so to go around your bust. Now, for the last and final step...
Step 1: With your dress on, measure from the top in the front to the top in the back. This tells you how long your straps need to be.
Step 2: Cut your fabric to double your strap width plus 1". For me, I wanted 2" straps, so I would cut it 3" wide. And cut it to the length you want, plus 2". I wanted 10" long, so I cut a 12" long strip. Cut 2 strips, one for each strap.
Step 3: With right sides facing, pin the raw edges together along the long edge and one short edge.
Step 4: Seam 1/2" from the edge, along the long side and one short side, leaving the other short side open.
Step 5: Turn the strap right side out. Head back to your iron and press the seams flat.
Step 6: Turn in the raw edge of the unfinished short end and press 1/2" of the raw edge to the inside of the strap.
Step 7: Slip stitch the open end closed.
Step 8: Attach the strap to the top of the dress in both the front and the back. Sew a 1/4" seam, placing stitches in the hem of the dress. (That's 1/4" from the edge of the strap and 1/4" from the edge of the dress top.)
TaDa!! Try your dress on!

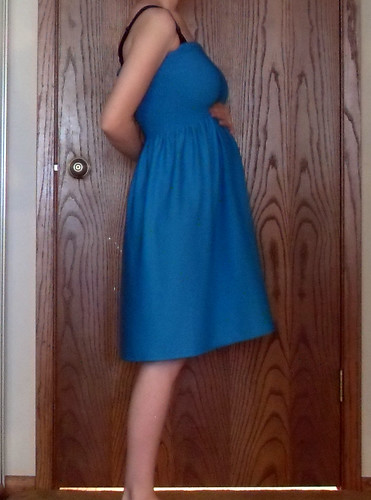
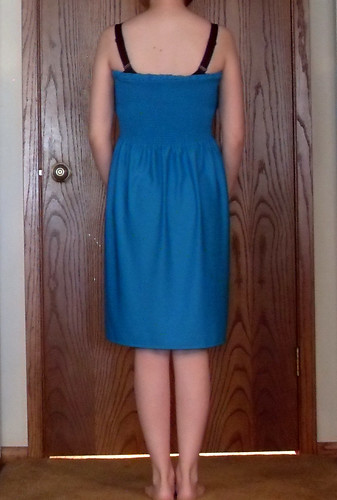
Now you are absolutely all done. I'm not sure I'm actually put on the staps. I don't know if the style really fits large chested women like me. It does fit nicely as a maternity skirt (you can do the same technique, but with less rows of shirring, just enough to create a waist). Tell me what you think!
Here are few sites that I found that helped me figure out the shirring and elastic thread thing. Review them if you're having trouble!
Pretty Ditty Shirring Tutorial
ThreadBanger Shirred Summer Dress