Friday, December 10, 2010

Baby Amnesia

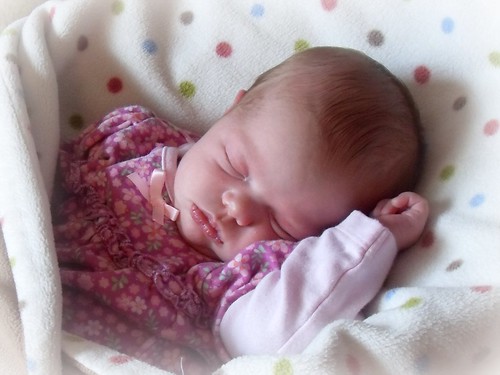
My husband claims to be done having children. One boy, one girl, two kids = no more babies! I, on the other hand, haven't decided. I'm thinking three children would be nice, especially since I birth such beautiful babies, but I'm also terrified to go through another newborn phase. Yet, even now, as Miriam is only 10 weeks old, I look back and say to myself, "Yes, it was hard. It was agonizing. I remember thinking I was going to die. But it really wasn't that bad, was it?!"

Miriam is starting to come into her own. She's awake quite a bit during the day now, and for the most part manages to sleep at night. (Don't ever ask a mother how her baby sleeps. Do you really want us to start crying?!) She wakes for two feedings in the night. Usually she falls right back asleep after the first one, and I usually fall asleep while she's nursing so if you ever thought to walk into my house in the middle of the night, you might get a pretty indecent show! The second feeding is mostly a hit or miss if she'll fall back into a deep sleep. Every other night, she might be grunting and groaning and straining against her swaddle. She's not fully awake, and heaven forbid if you take her out of the swaddle, but she's not restful and so I don't fall back asleep. During the day, when she's awake, she is more able to be set down and be played with. I'm no longer standing with her, constantly walking and jiggling her, or crying right along with her. When she's napping though, she does prefer to be cuddled right up on my chest. I'll give her that; it's my time to sit and relax too!

Have I mentioned that she was diagnosed with GERD at 8 weeks? I asked the pediatrician about it on a whim. Prior to that appointment, she wasn't sleeping if she wasn't being held in an upright position. She needed to be in constant motion and was searching to nurse every 20 minutes or so. I actually figured out how to nurse her in the Saddle hold so that I could jiggle my leg and keep her from crying while eating. So I asked if there could be a reason that she would not lay down, maybe acid reflux?

Here's how my pediatrician explained it: All babies have a degree of acid reflux. The muscles at the top of their stomach just aren't strong enough yet to keep everything in, so the fluid just sort of sloshes back and forth. This is why babies are prone to spit. There isn't much acid in the stomach at birth because breastmilk really doesn't need much to be digested (formula does need more, but alas, babies were designed to drink Momma's Milk and that's partly why formula fed babies have thicker poops than breastfed babies...more undigested product coming out!). However, some babies are extremely sensitive to even just a little bit of acid, and then they show signs of colic and GERD. The medication used to treat it is a very gentle version of Zantac, and it works as quickly as adults eating some Tums. It's taken some trial and error to get the right doses for Miriam, and we're still not at a perfect dose for her, but she is growing very fast and it's hard to keep up. She is now comfortable most of the day though, and it is expected that she will outgrow this as her stomach muscles mature around the 3 month growth spurt.

Yet, there is a possibility that she could have a dairy protein intollerance. That and GERD often go hand in hand. I have noticed that a day after I eat more dairy than usual (say anything more than the milk on my cereal in the morning), she is more fussy and more spitty. I've been hesitant to cut dairy completely out of my diet though because it is in everything from the obvious ice cream, cheese, and yogurt, to bread, potato chips, and soda. I've promised her though that if this doesn't clear up for her by the time she's finished the 3 month growth spurt, I will cut dairy out of my diet to see if it helps her. The dairy allergy (also known as a casein allergy) is usually outgrown by 3 years, so I probably don't have to worry about packing school lunches yet.

Benjamin loves his little sister. He enjoys playing with her, tickling her, showing her his trains and cars, and tries to pick her up so she'll sit in his lap. Careful what you show a toddler because they'll want to do it over and over and over again! I still don't get to do as much playing with my little man as I'd like, and I never get any one on one time with him anymore. I know he's hurting for the attention because he's getting more frustrated with his days. The two little boys that I nanny for have gone to Australia for a vacation, and Benjamin misses them very much. He's been running up to every child we encounter and asking them to come play. Poor little boy! He needs more friends! I think it's time that I try to find some real playdates for him.

Me? I'm still dragging along. I'm getting more sleep now, so that helps me feel more human now, but I still do occassionally trade in my daily opportunity to have a shower in peace for an extra half hour of sleep in the morning. I can't always keep up with my housework, but now it's leaning more towards the "I don't want to be bothered with it" category than the "it's an impossible feat for me at this moment" category. I have, however, been doing much better at cooking meals for my family. I just bought myself a griddle and it's the most awesome thing ever! If it can't be cooked on the griddle, it won't be cooked in this house! I am, however, really missing my opportunities to have a bit of freedom. I miss being able to run to the store without a ton of effort and planning. I miss being able to go out with friends on a Friday night. I miss having a phone call that doesn't leave the other person saying, "Should I let you go? I hear your kids crying in the background." Chris is doing his best to support our family, but it means he's not around to help me very much or give me the breaks I feel I need. I look forward to the summer when he will be home in the evenings again. Frankly, I look forward to the week between Christmas and New Year's when all music goes on a short vacation!

The kids got to go see Santa Claus at the mall today. Once again, I had to sit in the picture with Benjamin. He wasn't exactly scared of Santa. He just didn't want to sit and have his picture taken. There were much more interesting things behind the camera counter! I wish Chris could have been in the picture too, but he was the one behind the camera this time.

Merry Christmas everyone!

Merry Christmas 2010

Thursday, November 11, 2010

Working WITH Mothers

Have you ever had a day that made you wish you had not made any of the choices in your life that brought you to that moment? Yesterday was just such a day for me.

Becoming a parent to a toddler and a newborn has not been an easy feat for me to manage. I'm not nearly as patient or as giving as I had envisioned myself to be. I also find myself with less dedication to the parenting principles I had set forth in the beginning of my motherhood with Benjamin. I tell myself that if I could just put myself back on track with those, everything would be so much easier. Maybe, maybe not.

Miriam has been struggling with colic, and there are days that it is manageable and days that it is much, much worse. I've done all that I can for her and it's not enough. It's so heartbreaking to see and hear her scream. The only thing that brings her comfort is being held. However, her definition of "being held" changes hourly. Sometimes being scrunched up on my chest is enough, other times it must be high up on the shoulder, and yet others it must be some position that we have yet to determine.

Benjamin is a toddler. He's beginning to assert his independence but doesn't yet know the dangerous situations in which he must follow Mommy's directions. Temper tantrums are a daily norm. Unfortunately, they are getting out of control because I'm often not able to get on the floor with him to diffuse the situation. I feel very bad that I'm not able to have my hands free to cuddle and play with him like I did 6 weeks ago.

Besides the half hour quick dash to the store last weekend to purchase Benjamin a winter snowsuit, I have not left the house for anything but work and church and doctor appointments. It's been too difficult to go out in public with a toddler that runs away from me and a newborn that can't just chill out in the stroller or carrier. I often use the Moby wrap around the house, but it's not a great option for going out because we live in Wisconsin and it's starting to get cold outside, too cold for taking out of the carseat without a jacket on (which we've been told not to put one on a baby in a carseat because the seatbelt won't be tight enough). But, I might just go crazy if I don't get some time out of this house for fun!

So, please, when you see a mother who looks ready to cry as her toddler runs away down the street screaming, "No!" and as her newborn is crying because she's not being held the right way, please offer her help! Do not just shake your head and keep walking. I really need a village to get through this.

Friday, October 15, 2010

2 Weeks

It's amazing to me how much my kids look alike, yet so different!

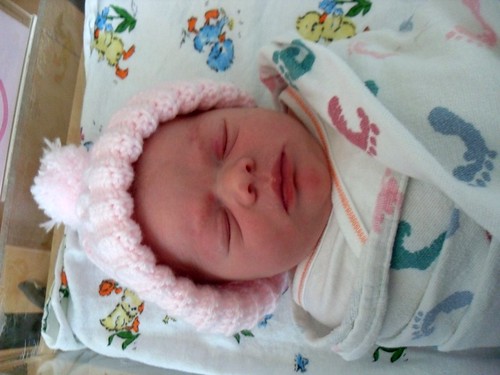
Here's Miriam at 2 weeks:
Miriam Elizabeth - 2 weeks

Here's Benjamin at 2 weeks:

Saturday, October 2, 2010

She's here!!

Miriam Elizabeth made her grand entrance into this world on Thursday, September 30, 2010, at 5:04am! She weighed 8lbs, 5oz, and is 20.5" long. She looks exactly like her older brother, Benjamin, but definitely more "girly" in her features.

Miriam Elizabeth

I had been sitting at 5cm dilated for two weeks, and being at risk for a placental abruption, my OB decided to do a membrane sweep at my 9:00am appointment to see if we couldn’t get labor jump-started. About an hour after the appointment, I started a dull back pain. At 6:00pm, I started to have contractions. They didn’t hurt, but they were felt first in my underbelly and then spread to my entire lower back. They were very regular, starting at 8 minutes apart, but never got stronger and never got closer together. By 8:30pm, they were pretty much gone, or maybe I had just become accustomed to them and didn’t notice anymore! I had been sitting on an exercise ball, and it had done a great job at relieving the back pressure because I could roll back, stretch my hips, and sink into the ball. So, at 9:30pm, I decided to just go to bed.

I woke at 10:55pm, feeling a strong contraction in my lower back. After two of those, I woke my husband, Chris, and told him that I needed his help to get through the contractions. He applied counter-pressure (pressing both in and down on my hips to give a “spreading” feeling), and the warmth of his hands made the contractions seem like nothing at all. These were very irregular contractions, first at 6 minutes apart, then 5 minutes, then 10 minutes, then 15 minutes, then back to 5 minutes. I laid in bed for another hour, then decided that they weren’t going away and we should call my father to come stay the rest of the night with Benjamin. I told him that the contractions weren’t regular, but it was going to happen tonight, and asked if he wanted to come now or should we call him when we were certain we were going to the hospital? He opted to come right away as it takes him 45 minutes to get to our house. I decided to take a shower to bide the time, but by the time I was done, my contractions were so strong that I was having difficulty breathing through them on my own. So as soon as my father arrived to babysit Benjamin, we left for the hospital, even though my contractions were still irregular.

When I arrived at 1:30am, I was 7cm dilated. I chose to sit on the birthing ball since that’s what worked for me at home. My doula, Vanessa, showed up shortly afterwards and sat in front of me to help control my breathing, while Chris continued to sit behind me and applied counter-pressure to my back. My contractions remained irregular, both in timing and in strength. It felt like I would have one really strong contraction, then a small one, and then a large one again. I had a few contractions that were so hard and so long that I vomited immediately afterwards. Everyone assured me that vomiting is good because it acts as 10 contractions since I’m pushing downward with each vomit. Though, I wished I hadn’t chosen to eat Sloppy Joes for dinner! At about 4:00am, I moved into transition and I changed my breathing to a moaning. I felt like I had a better control over the release of the pressure by using words like “okay, okay, okay,” and that actually made me smile and calmer because that’s what Benjamin says when you ask him to do something, “okay, okay, okay.” I moved to the bed on my knees and hung my upper body over a support bar when the contractions became really intense. The support bar was a little high for me, so I turned around on my hands and knees and buried my face into a pillow. I did a lot of physical shaking with the transitional contractions.

At 4:55am, my contractions made a sudden change to strong, regular, smooth contractions. With two of these, my water broke, and the very next contraction had me pushing the baby’s head out! The nurses tried to encourage me to lay on my back, but I didn’t want to move from my hands and knees, so that’s where I stayed for the pushing. At first, the nurses were telling me to push, but I told them, “Stop telling me to push! Don’t tell me to push! I can do this on my own!” I’m afraid I embarrassed Chris because of how vocal and loud I was being. I don’t feel that I actively pushed, but that I let the contractions do the work. To be absolutely honest, as the head was crowning, I got very scared and I wanted to stop, but I couldn’t. It was okay though, because 6 minutes later, Miriam was fully delivered!!

The on-call doctor showed up 15 minutes later, and the only thing she did was deliver the placenta which was being very stubborn. She administered pitocin for that, and I’ve had it one additional time because I’m having a hard time with getting the post-partum clotting to stick.

I’m feeling pretty good!! I had a tiny little tearing, not even enough to consider a 1st degree, which is wonderful compared to the 4th degree one I had with Benjamin. It’s amazing how wonderful and proud I feel after a non-medicated birth!

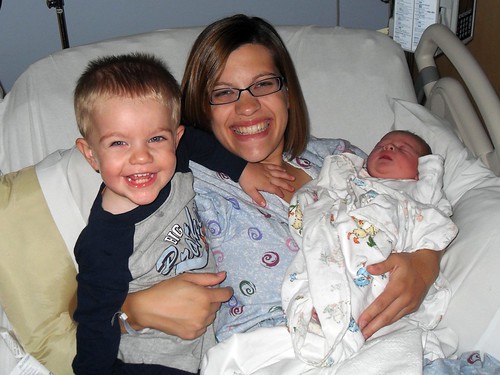
Benjamin, Miriam, and Mommy

Benjamin is enjoying being a big brother, if only because it means that the grandparents and Daddy are at home everyday. He hasn't quite figured out exactly how this new baby relates to him. As a toddler, it's still all about Benjamin!

Wednesday, July 14, 2010

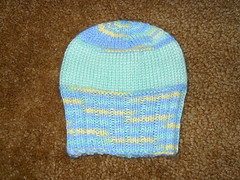
Sweet Dreams Baby Hat


This hat pattern is a very special one for me. When Benjamin was born, the hospital staff gave him a handknit hat. It fit him so perfectly, not nearly as tight as all the hats I had knit him, plus the ribbing was long enough to cover his ears. That's an extremely important feature to have in Wisconsin when you're born in February!!

So when I joined a Hat Swap for other babies due to be born in October, right around the time I'm due, I knew right away that I wanted to share this wonderful hat. I searched high and low for a pattern that would create a similar hat, but I could not find one. Finally, I reverse-engineered Benjamin's hat to create a hat for my swap partner's baby. Although Benjamin's hat had a pom-pom on top, I opted not to put one on this hat. I'm always a little wary of removeable items on baby clothes, and a pom-pom on top makes it a bit difficult to use a head support when in a carseat because of the added height to the hat, so no pom-pom for us! (It is a really cute feature though, so go ahead and make one if you'd like!)

Sweet Dreams Baby Hat Sweet Dreams Baby Hat

Materials
Yarn A: Variagated sport weight yarn
Yarn B: Matching solid color sport weight yarn
Size US 4 (3.5mm) double pointed needles

Guage: 6sts/9rows = 1" in stockinette stitch

Directions
In yarn A, cast on 72 sts using the long-tail cast-on.
Join to work in the round.
Work K2,P2 rib for 3".
Purl next round.
Switch to yarn B, knit in stockinette stitch for 2 inches.
Switch back to yarn A, knit one round.
Purl one round.
K one round
*K6, K2tog, repeat from * 9 times.
K one round
*K5, K2tog, repeat from * 9 times
K one round
*K4, K2tog, repeat from * 9 times
K one round
*K3, K2tog, repeat from * 9 times
K one round
*K2, K2tog, repeat from * 9 times
K one round
*K1, K2tog, repeat from * 9 times
K one round
*K2tog, repeat from * 9 times
Cut yarn and thread through remaining 9 stitches. Weave in ends.

Sunday, July 4, 2010

Infant/Toddler Pillowcase Dress

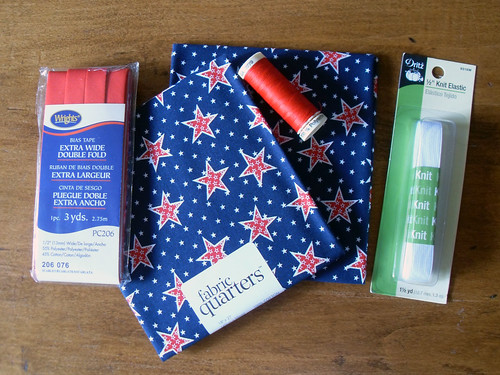
Infant Sundress Tutorial - materials
Materials:
2 pieces of 18” x 16.5” cotton fabric (I used two fat quarters for this dress)
14” of 1/2” knit elastic
1 package of 1/2” double fold bias tape (great tutorial here!!)
matching thread

Normally, one would use a pretty patterned, embroidered, or vintage pillowcase to make this dress. However, I wanted to make my daughter a dress that would match Mommy's dress, and I certainly couldn't fit into a pillowcase! You can still use a pillowcase if you would like, but just ignore steps 2-3 since the pillowcase will already have that completed for you. (When measuring the 18” on your pillowcase, use the opening as the bottom of your dress. Then you won't need to hem!) This dress should fit from 6 months – 18 months (finished length is 16.25”).

Step 1:
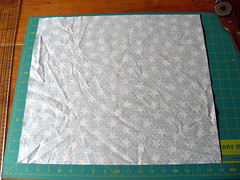
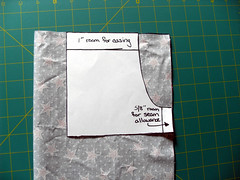
Infant Sundress Tutorial - cut fabric Infant Sundress Tutorial - armhole template
(click on each picture for a bigger view.)
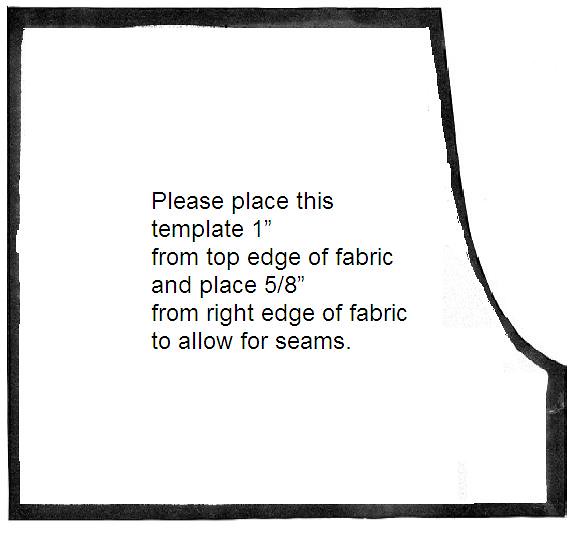
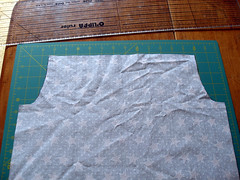
Lay the two pieces of fabric on top of each other, right sides together, and cut edges matched (or turn your pillowcase inside out). Fold the fabric in half lengthwise. Lay the armscye (armhole) template on the upper right-hand corner of the fabric, and cut along the j-shape to create armholes. Below is the template. It can also be found here on my Flickr page. Download and print the Medium(640) size. (I added 1" to the top and 5/8" to the side of my template after printing but before cutting so that I didn't have to measure once placed on my fabric.)

Armscye template for infant pillowcase dress

Step 2:
Infant Sundress Tutorial - armholes cut Infant Sundress Tutorial - side seams trimming
Unfold the fabric. With right sides together, pin along the side edges (from the bottom of the “J” down). Sew a 5/8” straight seam. Go back and sew another straight seam in the seam allowance, 1/4” from the first one. Trim your fabric close to the second seam. Do this for each side. Press seams flat towards the back (which side is the back is completely up to you).

Step 3:
Infant Sundress Tutorial - hemming Infant Sundress Tutorial - hems
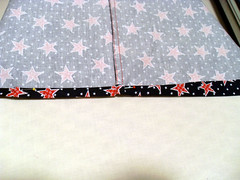
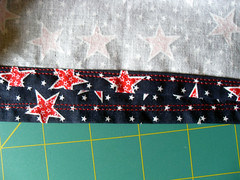
Hem your dress. Fold your fabric up 3/4” inch and press. Fold the raw edge down towards the pressed seam, hiding the raw edge on the inside, and press again. Stitch a straight seam 1/4” from the bottom of the dress. Stitch a second straight seam 1/8” above the first.

Step 4:
Infant Sundress Tutorial - step 1 on casing Infant Sundress Tutorial - step 2 on casing Infant Sundress Tutorial - casing
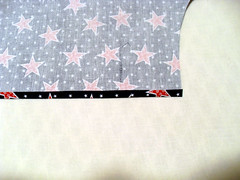
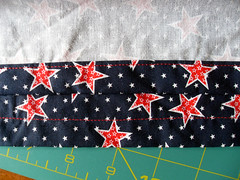
Create your top casing. Along the top of the dress, fold down 1/4” of the fabric and press. Fold down an additional 3/4” of the fabric and press. Sew a straight seam 1/8” from the edge of bottom press (leaving a tube-like hole above it). Do this for both the front and back pieces.

Step 5:
Infant Sundress Tutorial - elastic in casing Infant Sundress Tutorial - casing sewn shut
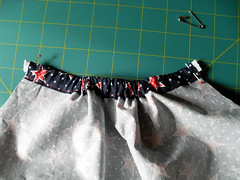
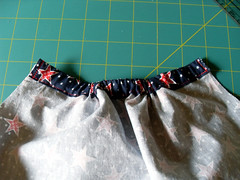
Cut your elastic in half so you have two 7” pieces. Using a safety pin for help, guide one piece of elastic through each casing. Leave 1/4” of elastic hanging out each side, and pin. Sew down the side of the casing, tacking in the elastic. To remove extra bulk, stretch the elastic ends and clip near the fabric.

Step 6:
Infant Sundress Tutorial - pinning bias tape Infant Sundress Tutorial - bias tape sewn on
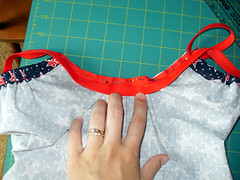
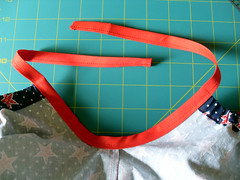
Cut two 26” strips of bias tape. Find the midpoint of each piece and pin to the dress armscyes at the seam under the armpit. Place as many pins as you need to in order to attach the bias tape smoothly to the armholes. There will be around 10” or so of bias tape hanging from the top of the dress. This extra bias tape will become the shoulder ties. Starting at one end of the bias tape, stitch along the open edge, continuing through the armscye and up the other side. Repeat this on the other armhole. (I found an invaluable video tutorial on how to sew bias tape. Without it, there may have been lots of swearing. Not good for toddler ears.)

Step 7:
Infant Sundress Tutorial - finished
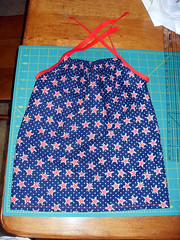
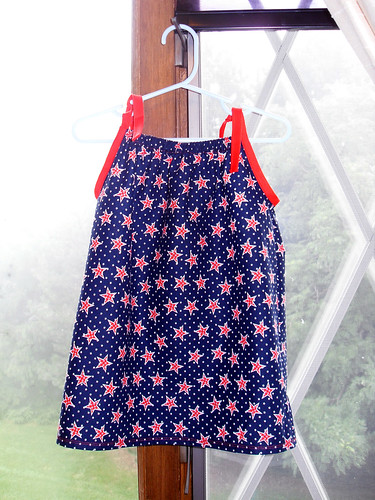
Put this nifty little dress on your favorite little girl! Tada! Beautifully (and safely) made!

Infant Sundress Tutorial - finished

Sometimes, you just have to give in...

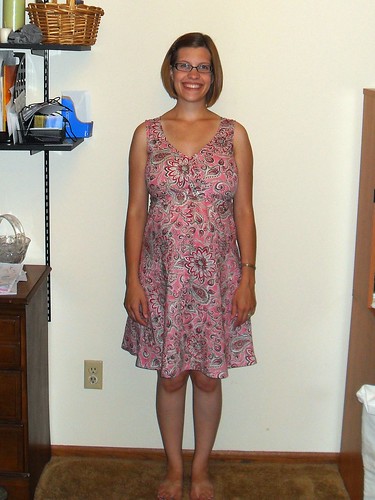
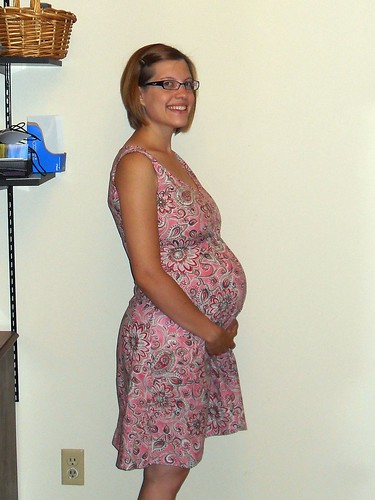
I finished a summer (maternity) dress for myself this morning. I haven't sewn any clothing for myself while using a pattern since I hit puberty, so I'm still learning how to fit for me. I should have added at least 2" to the bust area because my boobs pull the back so far forward that the armholes cut a bit into the back of my arms, and the boobs are a bit squished in there. Pattern is McCalls m6074.


(Yes, this is me at 28 weeks pregnant! I'm in the home stretch!)


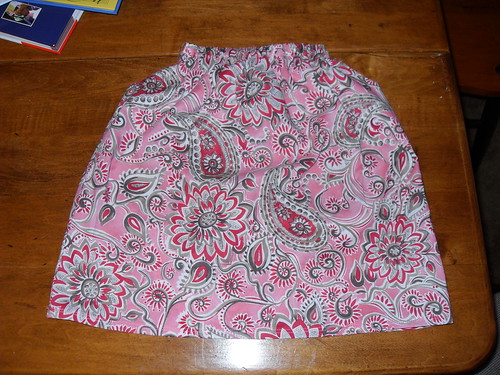
Then, because I had about 2 feet of fabric left, I decided to make my gestating daughter a matching dress. I made a pillowcase style dress, but without the drawstring. I didn't want her to get a shoulder strap caught on something and end up choking herself! So I put some 1/2" elastic in the casing instead. I've got to run to the store and pick up some bias tape binding, which I'm going to put around the armholes and use that for the shoulder ties. I hope to find some matching fabric to make bloomers out of too! This dress is suggested to fit 6 months to 18 months (though likely as a shirt by 18 months).


(Tutorial to follow when the dress is all finished!)

Sunday, June 27, 2010

My little girl

We had our anatomy ultrasound just over a month ago (May 21st), and much like Benjamin's ultrasound, it's taken me this long to having more than just "a baby" growing inside my belly. If you couldn't guess from the post title, we're expecting to give birth to a little girl! See, she's already a drama queen! (That's her arm she's throwing over her face.)


So far, this pregnancy has been so different from what I experienced with Benjamin. His was a pretty easy pregnancy, nothing too special to report. I had mild pregnancy-induced anemia with him, and I spent my entire second trimester sick with bronchitis. However, the bronchitis isn't really unique to the pregnancy, as I get it every time I have a cold, but it took much longer to treat because I didn't want to be aggressive in the antibiotics during pregnancy. I had some swelling in my legs, ankles, and feet, but I did stand for about 10 hours a day at work, and the swelling went away overnight. I had no nausea, and no heartburn...until I was in labor (and then I couldn't stop vomiting, but I'm told this is a good thing, and I had my first heartburn 16 hours into the labor when I munched on an ice cube). Labor was hard, 18 hours of active labor, even though contractions started 2 days before I decided it was time to go to the hospital. It was all back labor, and I finished with a 4th degree tear when his head and shoulders came out in one push (I only had to push for 30 minutes...pretty excellent for a first timer!!).

This pregnancy started so differently. I had horrible nausea and morning sickness for the first 12 weeks. I gained no weight in that time (with Benjamin, I had already gained 7 pounds), but I was lucky that I didn't loose any weight either. I had to make a trip to the Urgent Care clinic on the day of Benjamin's 1st birthday party to request IV fluids because I was so dehydrated that I couldn't stop the vomiting. As I started filling out the pregnancy body, the weight is distributed more on my hips and less in front. After gaining no weight for the first 12 weeks, in the following 8 weeks, I have gained 17 pounds! I was freaking out just a little that I might gain more than the 30 pounds I gained with Benjamin (but I have full confidence in my body for loosing the extra weight - I lost 35 pounds in 12 weeks post-partum.), but I think it all makes sense now. Now, I have the Never-Ending Heartburn. Yes, I have given it it's very own title. Everything gives me heartburn: milk, water, toothpaste (which I don't even swallow...),Tums, sitting down, lieing down, standing up and stretching. I have pretty severe pregnancy anemia this time, so I'm not supposed to take any Tums at all because the calcium can block iron absorption, but I do sneak some in with the hope that it will do something for just a little bit. I'm getting used to it though, but it does mean I don't eat nearly as much as I was between Morning Sickness and the Never-Ending Heartburn. I don't think I'll put on the 50 pounds I was scared of. :-) So, with the major differences in pregnancy symptoms, I have guessed from the beginning that the baby would be a girl!

Here's another picture of my little girl, whom we have decided to name Miriam Elizabeth.


Answers to the questions I hate the most:
1. When exactly is your due date?
We are only telling people "October." This is for several reasons. We have not been able to determine an exact due date as we weren't quite expecting to become pregnant and the ultrasounds have been "inconclusive" for dating. All we have is a 2 week possible range. My OB will also not be inducing me, except in the case of danger to the baby, because of this, and because both he and I believe if the baby is not preparing to leave my body, it's because she's not ready. Also, Benjamin was 10 days late from the due date and I was sick and tired of the harrassment of "Any baby yet? Why are you still here at work? Are you still pregnant?" I don't want to hear that this time. So while there is an arbitrary "date" set in my doctor's file, I'm not sharing it.

2. Aren't you glad you're having a girl?
Why, yes, I am glad...to be having a healthy baby! It makes absolutely no difference to me if this baby is a girl or a boy. I was not hoping or planning for one or the other. Frankly, things may have start out easier if this baby was another boy. I already have all the clothes I need for a boy. I wouldn't have to be worrying about how long I can keep the two children in the same bedroom before we have to move to a 3 bedroom home. And I love my little boy so much! I would never wish him to be anything but what he is!

3. Are you done having kids now?
Actually, most people state this question as a matter of fact. "Oh, the perfect family! Now you can be done having kids." It's very nice they all think this way, but it was not my goal to have one boy and one girl child. My family was perfect with just Chris, Benjamin, and I. It is even more perfect with Chris, Benjamin, Miriam, and I. And should we decide we would like another child added to the family, it will only become even more perfect and special! The only factors that play into our decision of how many children to have are, "Can we financially support our family?" and "Can we emotionally support our family?" There is no ideal number of family members in our minds.

As you can see, I've been remiss at being regular to update this blog. I may not post anything until near labor or post-birth. For more regular and current updates in my life, feel free to friend me on Facebook! (search for pfarfigknittin(at)yahoo(dot)com and write me a little message to explain who you are if I don't know you in real life!)

Monday, May 17, 2010

How to Make a Shirred Sundress: The Instructions

Okay, you've done your measuring. You've done your fabric shopping. You've even prepared your fabric. So...what are you waiting for?!?!

Lay your fabric out on the table or other hard surface, and drag out your measuring tape. (You'll notice that I am using a cutting mat for guiding my cuts. If you are using a patterned fabric, you probably won't need to use one for your cuts as you can use your pattern to guide you.)


Step 1: Start by cutting off the top salvage end. The salvage is the place where the fabric threads were strapped onto the loom. Unless it's a very pretty salvage (most aren't), you'll want to cut them off.

Step 2: Measure from the top of your fabric to the length you want your dress to be. For me this is 44" + 1" for seam allowances. Make your second cut along the bottom of the fabric.

Step 3: Lining up your first two cuts, square off one end of the fabric to make it start looking like a rectangle.

Step 4: Measure from your last cut across the fabric to the width you need for your dress. (Bust measurement x 2. This is 56" for me.) Make your final cut at this measurement to turn your fabric into a rectangle with right angles.

All your cutting is done! Set aside any fabric scraps you have for making the straps. Now break out that iron, and let's create the skeleton of our dress!

Do these Steps 1-5 for both the top and bottom edges of your fabric.
Step 1: Lay the fabric wrong side up. Using your Seam Guide, fold up the edge of the fabric 1/2" and pin into place. Do this the entire length of the fabric.

Step 2: Using the appropriate setting on your iron, press your fabric to make a nice crease along the fold line.

Step 3: Removing pins along the way, fold up the pressed edge of the fabric another 1/2" and pin back into place. This will hide the "raw" edges of your fabric so that it doesn't fray.

Step 4: Go back to your iron and press this new fold into a nice crease.

Step 5: Start up your sewing machine. Using fabric matching thread in both the top spool and the bobbin, sew a straight stitch 1/4" along the edge of your fabric (this stitch should fall right in the middle of your creased hem fold.). Make sure you backstitch at the beginning and ending of your seam so that the thread doesn't pull out.

Step 6: With right sides together, fold your fabric in half, matching the two remaining raw edges, and pin together.

Step 7: Seam 1/2" from the raw edges.


Step 8: Head back to your iron and press the seam open.

Now you have 2 hemmed edges; this is the top and the bottom of the dress. And your dress will also now be a tube. Step back and admire the beautiful seams that you have created. Make your husband admire. Dance around the living room with your toddler. Be so rediculously proud of your half-done creation that your family thinks you've jumped off the deep end. :-)

Now, let's work on shirring. Shirring is the technique of using elastic thread to create a stretchy gathered fabric. Each machine is a little fussy with elastic thread, so if these instructions don't work for you, do a little Google search on "name of sewing machine - elastic thread." Chances are someone has tried it with your machine. If you can't find any instructions, leave a comment with the type of machine you have and I'll see if I can guide you. I've used both an old machine with a bobbin case and this new computerized, drop-in bobbin machine that has a specific elastic stitch. Practice these next steps on some scrap fabrics until it looks the way you want it to!


Step 1: Wind the elastic thread into your bobbin. You will want to do this by hand. Make sure that the thread isn't pulled tight that it's stretched out, but isn't so loose so that it's falling off the bobbin. Plop the bobbin into place, and, if you have a drop-in bobbin like me, make sure the elastic thread is running through the bobbin tension disks. Continue to use the fabric matching thread on your top spool.

Step 2: Lengthen your straight stitch to 3.5-4mm. Also, if you don't have automatic tension, set it to 4. (REMEMBER: Practice, practice, practice!! You certainly want to make sure this looks right before you go ahead and sew on your dress. Remember you will loose approximately 1/2 your fabric width because of the elastic. Also, your elastic thread should be smoothly sewn along the back. Adjust the bobbin tension if you don't think it looks right.)

Step 3: Putting your needle down in the middle of your side seam, sew your first shirred line 1/4" from the top of your fabric edge. (This is right on top of your hem seam. Because of this, you may choose to seam your hem with the elastic thread right from the beginning.) You may, or may not, choose to backstitch your elastic stitch. If not, leave at least 1" of elastic thread, and knot the ends together so that it does not slip through your stitching and become loose. I chose to backstitch 3 stitches.

Step 4: Stretching the fabric out so it lays flat (which is really stretching the elastic thread, not pulling the fabric out of shape), sew your next line of elastic stitching 1/4" from the first line of stitching.

Step 5: Continue sewing lines of elastic stitching, each 1/4" apart, until you have enough to cover your bust length (Measurement B). I have stitched until I reached 9" from the top hem.

Yay!! You have shirred!! You will notice that with each additional line of elastic stitching, your fabric gathers more and more. It should remain stretchy, enough so to go around your bust. Now, for the last and final step...

Step 1: With your dress on, measure from the top in the front to the top in the back. This tells you how long your straps need to be.

Step 2: Cut your fabric to double your strap width plus 1". For me, I wanted 2" straps, so I would cut it 3" wide. And cut it to the length you want, plus 2". I wanted 10" long, so I cut a 12" long strip. Cut 2 strips, one for each strap.

Step 3: With right sides facing, pin the raw edges together along the long edge and one short edge.

Step 4: Seam 1/2" from the edge, along the long side and one short side, leaving the other short side open.

Step 5: Turn the strap right side out. Head back to your iron and press the seams flat.

Step 6: Turn in the raw edge of the unfinished short end and press 1/2" of the raw edge to the inside of the strap.

Step 7: Slip stitch the open end closed.

Step 8: Attach the strap to the top of the dress in both the front and the back. Sew a 1/4" seam, placing stitches in the hem of the dress. (That's 1/4" from the edge of the strap and 1/4" from the edge of the dress top.)

TaDa!! Try your dress on!


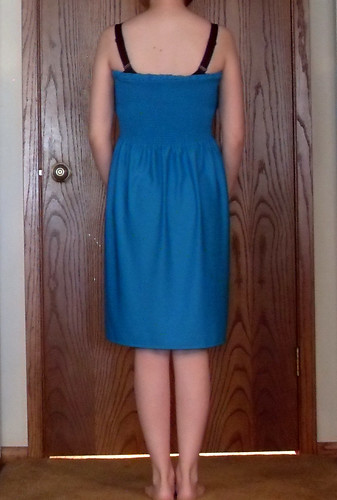
Now you are absolutely all done. I'm not sure I'm actually put on the staps. I don't know if the style really fits large chested women like me. It does fit nicely as a maternity skirt (you can do the same technique, but with less rows of shirring, just enough to create a waist). Tell me what you think!

Here are few sites that I found that helped me figure out the shirring and elastic thread thing. Review them if you're having trouble!
Pretty Ditty Shirring Tutorial
ThreadBanger Shirred Summer Dress

Sunday, May 16, 2010

How to Make a Shirred Sundress: The Fabric

I love to feel fabric. My mother used to take us along to the fabric store, and my brothers and I would look through the pattern books and run up and down the aisles, hands out and feeling the fabrics. When I pick a fabric, I pick first based on feel, second on color, and third on washing care. Of course, most times you do also have to pay attention to the fiber content and weave of the fabric, but you will find that even a 100% cotton fabric has varying feels and textures within that grouping.

For this project, if you are a brand new, novice sewer, please stick to a 100% cotton fabric with little to no stretch (pull both vertically and horizontally...every fabric has a little stretch diagonally). If you are more comfortable with different types of fabric, you can venture over to the cotton knits and jersey knits, maybe with a little spandex woven in. Because I am pregnant, and unable to predict just how large I will get, I have chosen a jersey knit with 10% spandex added.

When looking at colors and patterns, keep in mind that you will not be laying a pattern piece over your fabric. For newer sewers, you'll probably find it handy to choose something with a pattern that you can use as your cutting guide. Or, if you choose a solid color or difficult to follow pattern, you might use a cutting mat and rotary knife to help you cut a straight line.

So now you know what type of fabric you want. Let's look at dimensions and how much to purchase.

Fabric bolts have a sticker on their top telling you all about the fabric. It tells you fabric content (i.e. 100% cotton), how much total fabric is on the bolt (i.e. 8 yards), how to care for the fabric (i.e. machine wash warm, tumble dry low), and the fabric width (i.e 45 inches). When you pick a fabric to purchase, always take note of how to care for your fabric. Write it down or take a picture. You don't want to ruin a new project with the first wash!!
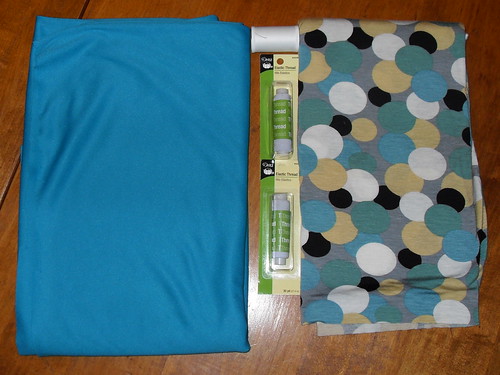
Let's go back to your dimensions. What is your Measurement C? This is how long you wanted your dress to be. If you want a 36" long dress, you certainly don't want to purchase a fabric that is only 28" wide. You would, at most, get a 27" long dress. So, now look for a fabric bolt that has at least 3" more in width than you want the length of your dress.

Now take your bust measurement (Measurement A) and multiply it by 2. This is how much fabric you will need to purchase from the bolt. For me, A x 2 = 56", or just over 1.5 yards, so I just asked the saleswoman to cut 2 yards. You also will need to realize that when the fabric is folded on the bolt, it very often isn't exactly equal. You may want to purchase at least 6" extra in order to square off your fabric. Otherwise you may find that at the top of the fabric, you have 60", while at the bottom you have 64" and you need 62".


For this project, I bought 2 yards of 60" wide jersey knit fabric. I want an ankle length dress. I also bought what was left of a patterned jersey knit bolt to make my scrawny, can-never-find-anything-appropriate-in-the-stores niece. That was about 1.38 yards of 42" wide fabric.

Also, purchase some elastic thread. Each of the spools shown contains 30 yards of elastic thread. I used up nearly a whole spool just in my practice, so I do recommend getting two right away. You'll also need thread in a color to match your fabric.

Bring your fabric home, and give it a good wash and dry. This will loosen the fibers and they will fall into their place. If you don't wash your fabric prior to cutting and sewing, cotton especially, your first wash will shrink your finished project and likely pull on the grain of the fabric, leaving you a mess that you'll probably never wear again! Then, iron your fabric according to the instructions on the bolt. If your fabric is wrinkly, your cuts won't be straight.

Next: Cutting the Fabric and Sewing the Dress!

Tuesday, April 20, 2010

Time Out

I'm sorry I haven't posted the next in the Sundress Tutorial. I had this wonderful LONG post on fabric, and it took me quite a long time to write it, as I have 3 toddler boys running around. However, the laptop battery died just before I came to "publish post," and there must have been a glitch with Blogger because it only saved half the post. So...you'll have to wait a bit for me to stop being mad at Blogger and rewrite it. :-D

Also, the sewing has halted. My machine is a VERY old machine, and it just doesn't work well anymore. So I'm getting a new machine!! I'm very excited!!! It's an early early Christmas present from my parents. It's a beautiful Brother 110-stitch Computerized Sewing Machine. And now I must await for it to be delivered. It really is like Christmas!!

Saturday, April 17, 2010

How to make a Shirred Sundress: Measuring

I stopped at a not-so-local JoAnn Fabrics today. I wasn't planning on it, but I walked past the window and saw a lot of 50% off signs over their fabric bolts. I figured it couldn't hurt to go look! My local JoAnn's doesn't have much in the way of clothing fabrics, just a lot of quilting cottons. This one was quite split down the middle: half quilting cottons, half clothing fabrics (knits, silks, shirtings, fleeces). I'm sure I bored my husband to death, but Benjamin was quite helpful rearranging all the thread spools in the display. :-) I was able to pick up 2 jersey knit fabrics for 1/2 off. After I grabbed the threads I needed, my total price for what I need to make 2 shirred dresses was less than $16! This is when my husband commented, "Why don't you shop here more often?" He may get his wish!!

Let's make some Shirred Sundresses!


(photo courtesty of TangerineSamurai)

So, while I found many tutorials online on how to create shirring, most of the available free patterns are designed for little girls, and this creates a problem for most adult women since we have boobs and hips that aren't necessarily proportionate to each other. The few patterns that I came across for women didn't go into enough detail for my liking. I'm a intermediate sewer. I have a good knowledge of fabrics and which one to use to get drape or structure. I know how to press a hem and tack down seams. I can do buttonholes, but I have to look up a refresher first, and zippers are off limits for me. I truly believe that this pattern, however, will work for absolute beginners. Just as long as you know how to use an iron and stitch a straight stitch, you can do this. I'll walk you through everything else!

First, we'll get our measurements. This is a "no-pattern" pattern, so it is very important that you get accurate measures with this. Get someone to help you, or stand in front of a mirror.

Bust Measurements:
A: This is your smallest bust circumference. It is the measurement used to determine your bra band size. Measure under your bra line. (I measured at 28")
B: This is your bust length. Determine where you would like the top of the dress to lay. Then measure from that point, over the fullest part of your breast, to the bottom of your bra. This number is the amount of shirring you will need to give a great umpire waist look. (I measured at 9")

Length:
C: Determine if you would like a short mid-thigh dress, or a knee length dress, or even an ankle length dress. This is important to know before you head to the fabric store. Start from your under-the-bra measurement (My measurement B was 9", so I put the 9" mark at the bottom of my bra.), then let the tape measure hang. Make note of where you want the dress to end. (I measured 49" for ankle length and 34" for just-below-the-knee length.)

Straps:
D: How wide of straps would you like? Straps are totally optional, but I cannot live without a bra, and frankly, I don't like my not-so-pretty bra straps showing. I chose a 2" width for my straps because that will give me 0.5" coverage on each side of my bra strap. I think length of straps is better determined after you have the body of the dress made and on. This way you give yourself a little room for error.

(You know, while you're doing all this measuring, measure yourself to make sure you're wearing the correct size bra. If you're built anything like me, you're likely to have been wearing a majorly wrong bra size for a long time. You'll be surprised at how great a good-fitting bra feels! Stay away from those online calculators. They're 90% wrong. Measure yourself around your bust at the widest point. Keep the measuring tape level with the floor. Take your fullest bust measurement minus Measurement A. Each inch equals one cup size. Your Measurement A is your band size, the result of your math is your cup size. So for me: fullest bust = 35", Measurement A = 28". I wear a 28G. Since you don't typically find that size in your local store, I had been wearing a 36DD for way too long!)

Next: Head to the fabric store!

Wednesday, April 14, 2010

Guess what?!

I'm pregnant with Baby #2!! I'm sorry I have been absent from the new blog, but can I make excuses? We found out about the pregnancy in January. It was kind of unexpected as we were planning on getting pregnant again in October 2010, not having the baby in October! Alas, it happened, and we're happy and excited. I had a miserable 1st trimester with lots of morning sickness, and since I have chosen to do extended breastfeeding with Benjamin, I found myself extremely dehydrated between supporting the two of them (Benjamin and baby). Once I reached the dehydration stage, I just couldn't keep anything in my system and needed the help of a few bags of IV saline solution to better myself. I can't say if I'm as exhausted with this pregnancy as I was with Benjamin, mostly because I'm generally exhausted from chasing him and the 2 toddler boys that I nanny around! However, I didn't have any morning sickness with Benjamin, so could this mean "girl?" We'll have to wait at least another month to find that out, so stay tuned!

Well, now that I'm heading into my 16th week, I'm feeling much better and the nesting bug has hit me hard. I don't really feel the need to prepare specifically for the baby though. Perhaps this is because I have the basics of everything we'll need for a new little one. If this is a girl, we will have to purchase some "girl" clothes to fill out the wardrobe that's filled with clearly "boy" clothes. There are some additional things we're looking at, such as a duo/tandem stroller, an additional convertible carseat, a highchair (right now we use a convertible booster chair that Benjamin will get to continue using), and of course, a minivan.

So what does a girl like me do when the need to nest is so strong but there's no need to actually prepare for the baby? She crafts! I'm looking forward to attempting to sew a few of my own maternity sundresses like the one below. I haven't been able to find "modern" maternity sewing patterns, so I believe that this style will allow for some extra belly room. Stay tuned while I search for my inspiration!


photo courtesy of Knittingand

Saturday, January 30, 2010

When we bought our condo in July 2008, we had these grand plans of remodeling. Or perhaps I should say I had grand plans of remodeling! My husband will instigate nothing of the sort.

The condo unit was staged beautifully. The previous owners, both of whom had passed away prior to the sale, had bought into the association as the units were being built in 1981. They were able to be right in the midst of the contractors, working with the designers to make it their own space. Because of this, we have a few amenities that no other unit has, such as a window in our dining room and an outlet in the main closet (they had placed a deep freeze there). They also picked out the carpet, fixtures, appliances, and wallpaper as the unit was built.

Click to play this Smilebox slideshow: Our Condo - The Before
Create your own slideshow - Powered by Smilebox
Make a Smilebox slideshow


As you can see, there's a tremendous amount of wallpaper and wall to wall carpeting. We had an assessor come take a look and with no structural damage, I thought it would be easy peasy to redecorate!

Unfortunately, as we tackled the kitchen and the main bath, we realized that there was no priming done behind the wallpaper. It was laid directly on the drywall. It didn't take long before our energy to continue burnt out. It also didn't help that I was getting more and more pregnant with Benjamin and couldn't handle all the fumes of wallpaper remover and paint. We left the kitchen half done with the wallpaper removed, a shody wall painting job, and cabinet faces repainted, and the main bath has half the wallpaper down.

This was supposed to be the year for finishing the remodel. However, we have had water damage to our unit seep down from the attic. This has damaged our walls and ceilings. I'm not going to be able to move forward with any cosmetic work until the structural work has been taken care of. Unfortunately, the condo association doesn't think that this work is a priority because they've taken care of the attic damage and "it won't get any worse" in my unit. It may be a year or two before they deem it worth fixing.

I wish I could say my condo looks as nice and clean as the seller's staging, but alas, I have 3 cats, a baby, and a husband. It will never look that good!

Saturday, January 23, 2010

What to say?

A friend teased me when I started up this blog, saying, "Oh, another blog that you'll never have the time to update." Well, she got me! To be honest, I don't know what I wanted to write about. I have my son, who is now 11 months old, and I could go on and on bragging about him. I have my family. I did host Christmas Eve for my husband's family, as is our new tradition since buying our condo, and there are a lot of changes with my siblings. I have our condo. There's a lot of renovation in the works. I have my knitting. Now that Benjamin can entertain himself a little bit more, I've actually found some time!

So, tell me, what do you want to hear about??