Showing posts with label baking. Show all posts

Friday, April 15, 2011

Making playdough

Benjamin wanted something fun to do today, and since we're no longer visiting family in California, we couldn't go to the park like he asked. It's a bit chilly (ummm...37 degrees compared to the 70s we left behind) and a little wet and soggy still. So I promised we would make some playdough. The kid loves to help in the kitchen, so I knew he'd have fun making it with me, and he's had fun playing with the commercial stuff in the past. I can't bring myself to actually purchase the containers from the store because I'm a bit of a perfectionist and get really disappointed when the colors are mixed together by toddlers and can't be undone. Homemade dough, however, is extremely inexpensive and doesn't seem to bother me to have to throw it in the trash when it dries out.

Ingredients
1 cup flour (I used unbleached white flour)
1 cup salt (I used Kosher salt)
1/2 tablespoon Cream of Tartar
1TB vegetable oil
1 cup water
food coloring

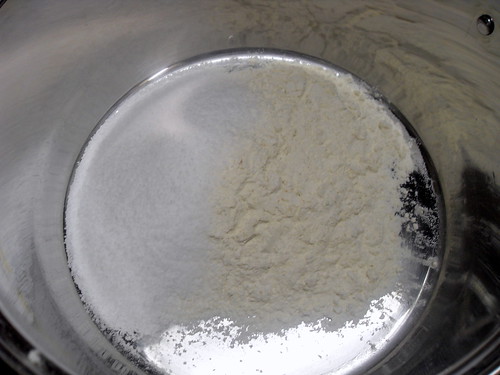
In a stockpot, place your flour:
Making Playdough - 1 cup flour

Add your salt:
Making Playdough - 1 cup salt

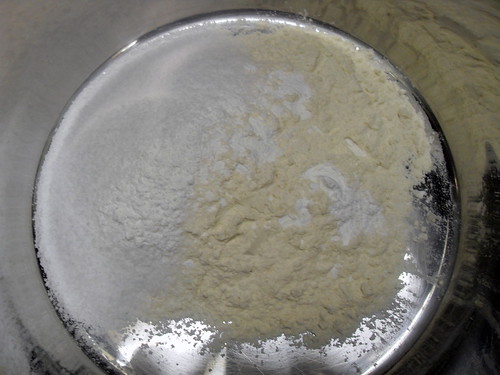
Then, your cream of tartar. This adds elasticity to the dough. It can be skipped, but you'll end up with a more crumbly dough:
Making Playdough - 1/2 TB cream of tartar

Pour in your vegetable oil. I will try substituting baby oil next time as I hear that will keep the playdough for longer since vegetable oil can go rancid:
Making Playdough - 1 TB vegetable oil

I mixed my food coloring into the water before adding to the pot. I found that 8 drops total gave a bright, true color. Turns out, Benjamin is an excellent mixer of colors! I think he's going to take after his Aunt Sarah in art abilities. I have Neon Food/Egg dye drops (McCormick brand), and I added 6 blue drops, and Benjamin insisted in adding 2 purple drops. Those 2 purple drops made the blue much more exact!
Making Playdough - 1 cup water with 8 drops food coloring

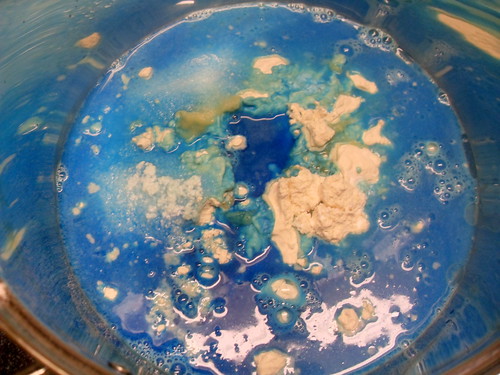
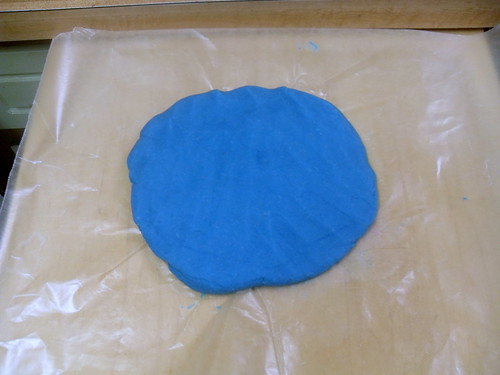
Cook this mixture on medium-low heat. You'll need to constantly stir in order to prevent the flour from burning. It shouldn't come to a boil, and the mixture won't get very hot. In a few minutes, it'll become very difficult to stir and the mixture will loose the liquid quality. Dump it out on a piece of wax paper:
Making Playdough - after cooking

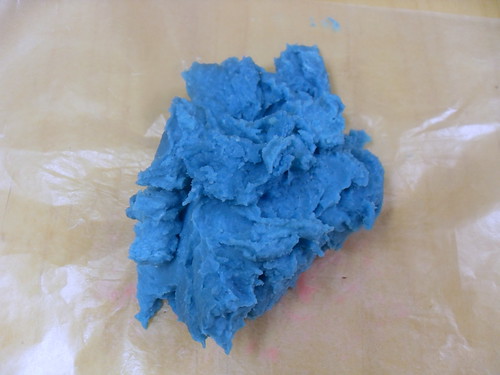
When the mixture is cool enough for you to handle (I was able to hold it immediately after dumping because it really doesn't get too hot), knead the dough. This will ensure that all the flour is mixed in and break up any color dye flakes that became concentrated. Afterwards, I patted the dough out flat to cool down faster.
Making Playdough - after kneading

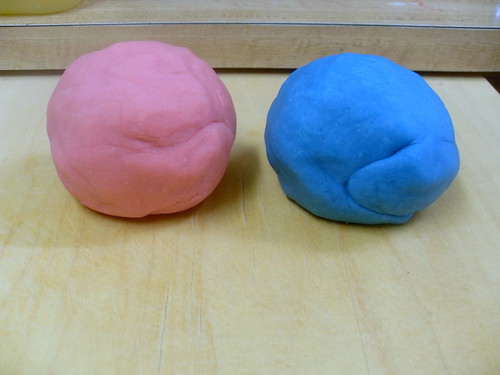
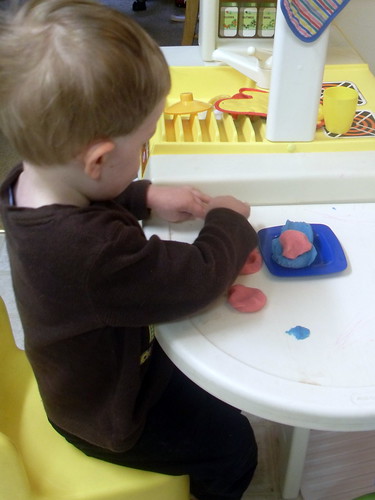
All done! I made pink and blue, upon request from Benjamin. Pink = 6 drops pink + 2 drops purple. Blue = 6 drops blue + 2 drops purple.
Making Playdough - pink and blue

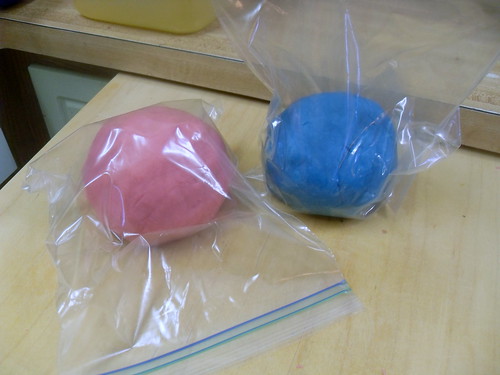
Once the dough is completely cooled, it should be stored in airtight containers. I keep mine in zip top bags with all the air squeezed out.
Making Playdough - store in zippered bags

Benjamin got right down to work making "dinner" with his dough!
Making Playdough - having fun playing
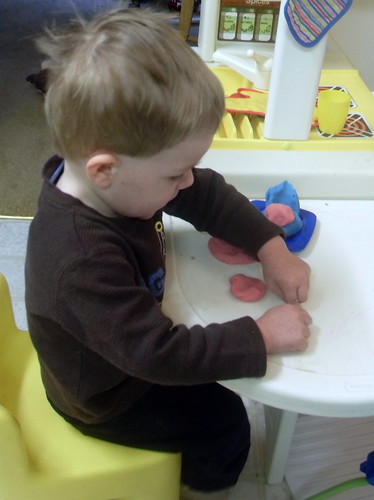
We had playdough hamburgers and pancakes for supper. :-)

I think this would be a great gift for Easter or birthday favor. Package smaller chunks in the plastic baby food containers or wrapped in cling wrap. Can you think of more novel ways to package it?

Tuesday, January 18, 2011

Nutella sandwich cookies

Ummm...so I'm totally not updating everyday, now am I? My computer's broken though, so now I have to share the desktop with Chris, and since we each only get computer time when the other has the baby, it's a juggling act and I'm trying not to hog it. You people out there are the only adult socialization I get nowadays!

Benjamin's becoming a little cook. He loves to "stir" things, though it's more like flinging things out of the bowl! I enjoy having him help because it means he's more likely to get excited over dinner if he helped make it. Last Friday, Daddy had Bake Club at work. Normally, I would tell him, "You signed up for it, you bake for it," but I usually do come up with an idea for him. I have 14 pounds of sugar cookie mix, and I started thinking about what can be made that's a little more exciting than just plain sugar cookies. I also cleaned up our pantry and discovered that I like to hoard Nutella. So...

Nutella Sandwich Cookies!

Bake your favorite roll-out sugar cookie dough in whatever shape you desire.
Nutella Sandwich Cookies

Drop a good sized dollop of Nutella right in the middle of one cookie.
Nutella Sandwich Cookies

Place a second cookie on top of it and give a little squeeze.
Nutella Sandwich Cookies

Repeat until you have used all 7.5 dozen cookies. Yeah, I made 7.5 dozen cookies (which only translates to 45 sandwich cookies).
Nutella Sandwich Cookies

Super easy, super yummy! Apparently some people at Chris's work had never had Nutella before. If you haven't had it, you are seriously missing out!!

Saturday, December 19, 2009

Peppermint Bark

We were walking through Costco the other day, when Chris stopped at a table laiden with holiday treats. My husband is the exact reason stores set up these tables. He picked up a half pound tub of peppermint bark priced around $8.00. He gave me the sad puppy eyes, and I said, "No way! I can make that for cheaper." Chris said, "But can you do it with both kinds of chocolate?" Oh, you bet I can!


This turned out way easier than I even thought, and in less than an hour, we had peppermint bark! I made two and a half pounds for less than $7.00. My husband is well pleased.

Ingredients:
roughly 1 pound milk chocolate
roughly 1 pound white chocolate
1/2 teaspoon peppermint extract
12 candy canes
butter

Directions:
Place the candy canes into a Ziploc bag and use a rolling pin or metal frying pan to crush into tiny little bits. Set aside in a bowl for later.
Line a jelly roll pan with a sheet of wax paper, and use the butter to grease the paper. This will help free the chocolate later.
In a double boiler (or a heat safe mixing bowl situated over a pot), melt the milk chocolate. Pour onto wax paper and spread evenly. Shaking the pan a little will help spread everything out. Place in refrigerator for 20 minutes.
Pull the milk chocolate out of fridge. Using the double boiler, melt the white chocolate and mix in the peppermint extract. Pour over the milk chocolate and spread evenly. Sprinkle crushed candy canes on top and gently press into the chocolate. Place in refrigerator for 20 minutes, or until hardened.
Remove bark from fridge and let sit for 15 minutes. Flip upside down onto another sheet of wax paper, and peel the paper off the bottom. Break the bark into bite size pieces.

Friday, November 27, 2009

Monkeys need to eat, too

I enjoy baking for my family. Pies, cookies, and cakes are packed full of love, then shoveled into their faces to go where love really belongs: their bellies! One of my favorite items is banana bread. I keep a freezer stocked of bananas that have ripened beyond the casual eater's likening. Every now and then, I'll pull out 3 or 4 bananas and make a loaf of bread. There's nothing quite like a warm slice slathered in butter!

Benjamin now enjoys eating with us. Correction: Benjamin stalks us for food. The kid is a bottomless pit! I much prefer to offer him homemade solid foods rather than the store bought prepackaged kinds. I know exactly what goes into it, and it certainly saves us money. So when I opened my freezer today and saw a shelf of bananas, I knew that I had to make him a treat. Afterall, our fridge is full of pumpkin cheesecakes! I thought about trying to turn my bread into a biscuit for him to eat. He is teething, and it helps ease the pain.

Monkey Cookies!


Ingredients:
3 1/2 cups flour
3 tsp baking powder
3/8 tsp salt
1 1/2 cups sugar
1 cup softened butter
3 eggs
3 mashed bananas (you can use frozen or overripe bananas; they provide a more intense flavor)
1 1/2 tsp vanilla
Directions:
Preheat oven to 400 degrees F.
Comine dry ingredients in a large bowl. Mix well.
Cut in the butter. The dough should be crumbly.
Add remaining ingredients, and mix well.
Drop by teaspoonfuls on an ungreased cookie sheet. Bake for 13-15 minutes.
Makes about 3 dozen. These cookies can be frozen.

These are very cakelike cookies, rather than hard biscuits, but as you can see, Benjamin enjoys them!