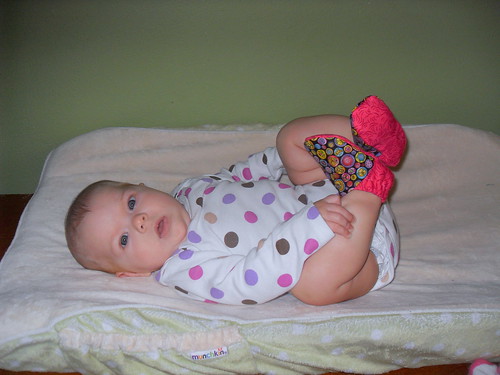
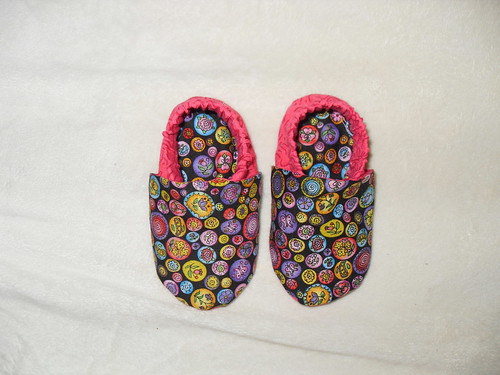
How feaking adorable are these??!!
A few of the girls that I commiserate with over on Ravelry have been sewing some adorable soft baby shoes. Of course, that meant I had to grab some fat quarters at JoAnns and try for myself! However, I didn't really read the instructions of the pattern they were using before purchasing my fabric, so I didn't get the bonded fleece it called for. A little craft site searching led me to a different pattern that a lot of people liked. I liked the looks of it, too, so I started cutting fabric, a little scared that it may be just a bit more fussy than I was hoping for.
Heck, no! These are super easy to do! If you can sew in a curved line, you can do this. I didn't make buttonholes for the elastic threading because I've never made them before. This seems like a perfect project to try them out though since they would be on the inside of the garment and no one would ever see the mistakes. One adjustment I did do was to the sole of the shoe. I wanted it to be a little thicker than just 2 pieces of cotton quilting fabric, so I cut up a flannel receiving blanket (those things are too small to be useful anyway) and laid it inbetween the two pieces of fabric. It's the perfect thickness now! The top and inside sole are of the funky dot fabric, while the heel and bottom sole are of the pink fabric.
I see a lot more of these being made. Shoes like these are being sold on Etsy for $18. My cost was $1.50 in materials and an hour of labor (say, $10/hr?), so it's a pretty good deal!
Monday, January 24, 2011
Friday, January 21, 2011
Dressing the Little Man
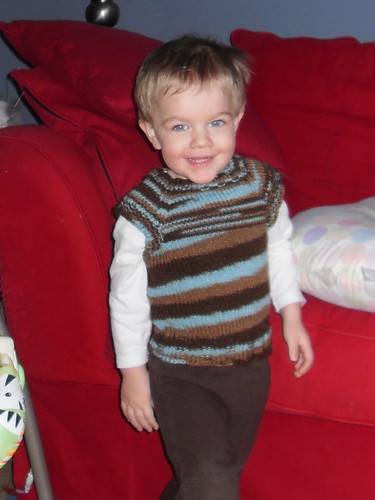
I love vests on little boys. Seriously love vests. There's no better way to turn a rough and tumble toddler into a stunning charmer than to slip on a sweater vest.
I wanted to knit something special for Benjamin since I had been doing so much knitting for Miriam before she was born. My little man was the object of many hats, mittens, socks, and sweaters while he was an unopinionated infant, but once he reached toddlerhood, his opinions became very strongly against handknits. But, there is one word that fixes all that: Special. Special mittens, Special hat, Special socks. Adding Special as a descriptor equals instant excited doning of the newly knit object.
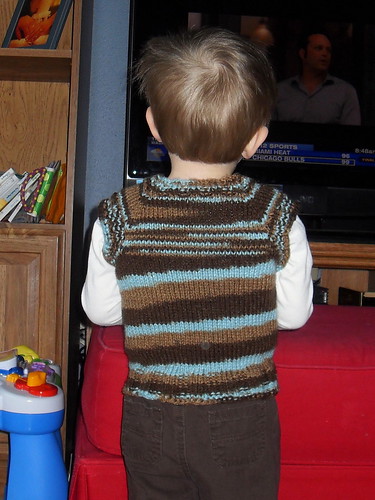
Introducing Benjamin's Special Vest
Pattern: Toddler T-Shirt Vest
Yarn: Red Heart Super Saver in Earth & Sky
Needles: US8
details at Ravelry here
Tuesday, January 18, 2011
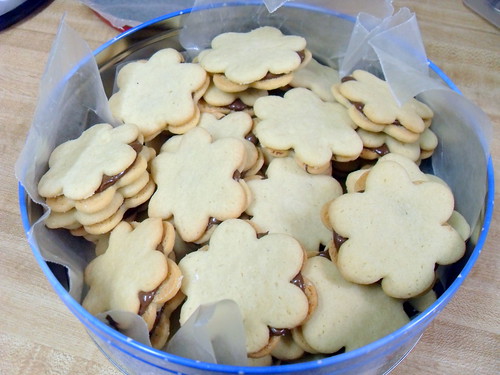
Nutella sandwich cookies
Ummm...so I'm totally not updating everyday, now am I? My computer's broken though, so now I have to share the desktop with Chris, and since we each only get computer time when the other has the baby, it's a juggling act and I'm trying not to hog it. You people out there are the only adult socialization I get nowadays!
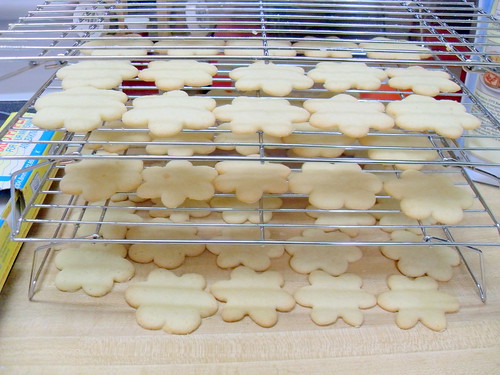
Benjamin's becoming a little cook. He loves to "stir" things, though it's more like flinging things out of the bowl! I enjoy having him help because it means he's more likely to get excited over dinner if he helped make it. Last Friday, Daddy had Bake Club at work. Normally, I would tell him, "You signed up for it, you bake for it," but I usually do come up with an idea for him. I have 14 pounds of sugar cookie mix, and I started thinking about what can be made that's a little more exciting than just plain sugar cookies. I also cleaned up our pantry and discovered that I like to hoard Nutella. So...
Nutella Sandwich Cookies!
Bake your favorite roll-out sugar cookie dough in whatever shape you desire.
Drop a good sized dollop of Nutella right in the middle of one cookie.
Place a second cookie on top of it and give a little squeeze.
Repeat until you have used all 7.5 dozen cookies. Yeah, I made 7.5 dozen cookies (which only translates to 45 sandwich cookies).
Super easy, super yummy! Apparently some people at Chris's work had never had Nutella before. If you haven't had it, you are seriously missing out!!
Thursday, January 13, 2011
Miriam's new hat
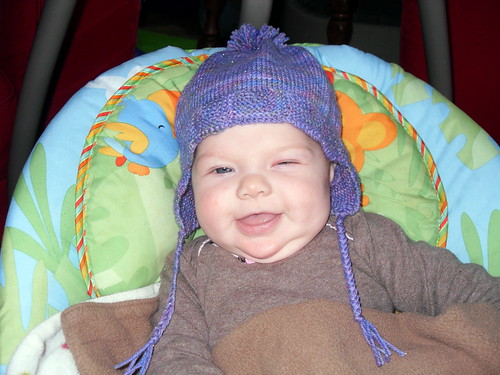
I had some leftover yarn (well, actually nearly half the skein!) from my Tympany hat. Miriam also has outgrown all of her newborn hats. Those two facts meant that it was time to knit Miriam a new hat, and why not a hat that matches Mommy's?
This is Miriam's Modified Jewel Hat
Pattern: Jewel Baby Hat with my own twist
Yarn: Dream in Color Starry, colorway Pansy Go Lightly
Needles were a US 3
More details on Ravelry here.
This is Miriam's Modified Jewel Hat
Pattern: Jewel Baby Hat with my own twist
Yarn: Dream in Color Starry, colorway Pansy Go Lightly
Needles were a US 3
More details on Ravelry here.
Tuesday, January 11, 2011
Art on the wall
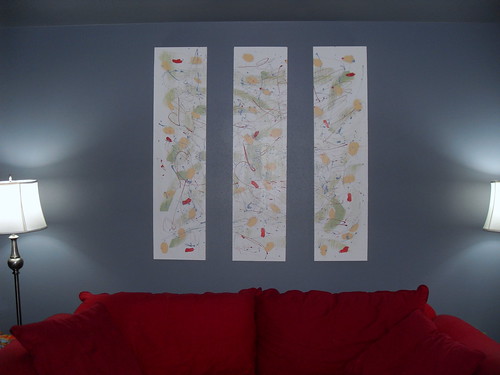
We just had our living room walls repaired from drywall damage so a nice new paint job was in order. The lovely blue really did make the room more finished and cozy. However, when all the painting was done, the pictures came off the wall and I decided to do a little moving around of things. I chose to move the picture that was previously above our couch to a different area of the room which left a big gaping space above the seating area. I had an idea of art work that I wanted over the couch, but I couldn't find anything that fit the specifications I was looking for. So, in my general "I can do it myself!" attitude, I got myself and the kids to Lowes and picked up supplies.
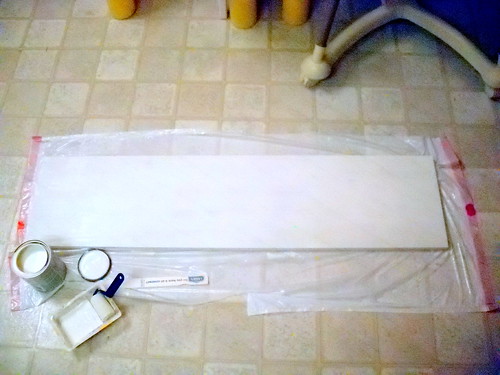
I bought 3 pine wood boards measuring 3/4"x12"x4'. I also got some large picture-hanging D-rings and heavy duty anchors for the wall. The paint is all leftover sample paint colors that are in my home.
First, I put on three coats of the base color (Olympic's White Smoke) using a small 3" roller. I could have probably gotten by with just one coat if I had taken the time to lay down some primer, but it really didn't use much paint for this project (I still have 1/2 the quart left) and it didn't take much time at all for this step. I let the base color dry overnight.
The next morning, I took my trusty 2" paint brush and got to work. The design is created by brushing, dabbing, dripping, and splattering paint from the brush. I didn't allow the colors to dry in between each application of a new color. It didn't make much of a difference since my house is pretty dry and everything set quickly. (Colors are all Olympic paint. Green = Quaking Grass, Red = Bonfire, Blue = Kaleidoscope, and Yellow = Toffee Crunch)
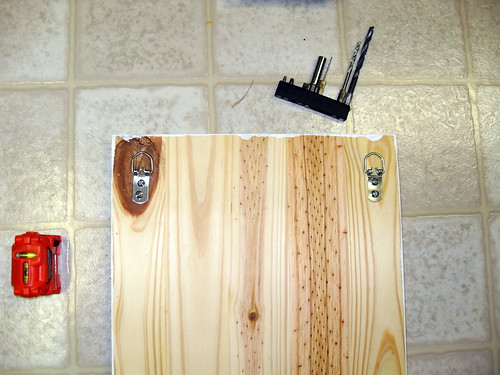
At the end of the day, when everything was dry, I flipped the boards over and installed some picture-hanging D-rings at the tops.
Then, with the help of my husband who is much taller than I am and can actually see that close to the ceiling, we hung the pictures on the wall with a 6" space between each board.
I think it looks pretty nice! I like that there's still plenty of white visible on the boards since it helps to reflect more light and brighten up the space. The blue on my walls (Sherwin William's Storm Cloud) makes the room pretty dark at night.
Sunday, January 9, 2011
Silent Sundays
I've had a very busy day filled with lots of family togetherness. So, from here on out, Sundays will be dedicated as always to my family and the blog will be silent. See you tomorrow!
Saturday, January 8, 2011
My new obsession
I've been a bit obsessed with babywearing recently. I was first fully introduced the proper method of babywearing when my sister showed me how to use her Moby wrap. I had been telling her how much I hated the old Evenflo Snugli carrier that I found at Goodwill (tip #1: good baby carriers will not be found in thrift stores!). I felt like Benjamin wasn't secure it in, and I couldn't lean over because he wasn't tightly held to my body. I wasn't sure how it was actually helpful! I learned that it was actually a very poor structure for babywearing. I deem it of the crotch carrying variety (like the Baby Bjorn). It provides no ergonomic hip or spinal support for baby and when you use it as a front facing carrier, it throws off the wearer's balance so you must arch your back a little to correct it. Learning that explained a lot about why Benjamin was unhappy to sit in it and why I was unhappy to wear it. And away we went into our babywearing adventure!
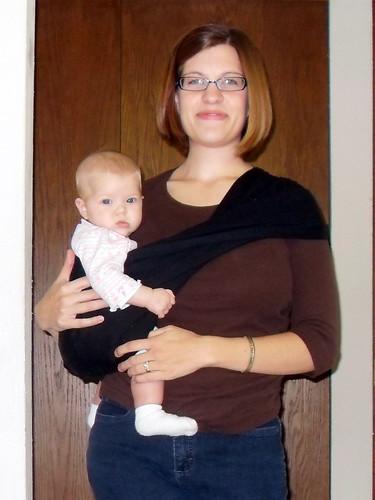
Miriam was being very kind in helping me show off my different carriers today. She loves them! She can be quite fussy when I put her down, but as I'm getting her wrapped (or strapped) up, she starts smiling or sighing. She knows what it means!
Well, first there was the Moby Wrap. I used this for a very long time with Benjamin. He was already four months old when I started wrapping him in this. I've done pretty much every hold one can think of, except for a back carry because that's not advised with a stretchy wrap, and it is by far my favorite wrap for small babies. Miriam has pretty much outgrown this one now. I find it starts to loose it's support once the baby reaches 15 pounds. However, it's an invaluable tool when working with newborns who just love to be held, cuddled, and carried right next to your heart!!
Moby Wrap - Hug Hold
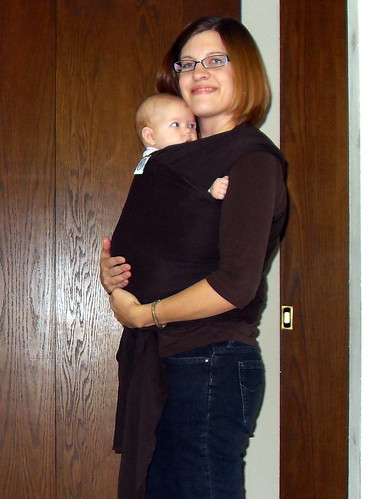
When I found out I was pregnant with Miriam, I started to loose my hips. Benjamin was too big for the Moby Wrap, but he still wanted to be held and carried a lot. But, he was entering his toddler exploration phase and wanted to be up and down quite often. This is when I purchased my Hotsling. It's sized to my pregnant body, so it's not my go-to choice unless I'm wearing my winter coat or lots of layers. I keep it in my car now for shopping trips. If Miriam is asleep in her carseat, I'll put Benjamin in the Hotsling to keep him from grabbing everything off the shelf. If she's awake, she goes in the sling and he sits in the cart. (And NO! This sling is not one of the recalled versions. A sling like this is safe. A bag sling like those are not. It is important that your baby's chin never touch their chest when babywearing, as they did in the bag slings and caused aspirations.)
Hotsling - Hip Carry
After my Hotsling, came my Maya Wrap. This is actual a handmade ring sling using the brand's sewing instructions. Because I used fabric from the remnants bin, just to see if I would like it (didn't want to use really nice fabric and hate it!!), I made it a double layered sling so that the wrong sides of the fabric wouldn't show. This is a great, versatile sling. It's the first time I tried back carries and worked well enough so that I could continue to play handbells while holding Benjamin, carefully avoiding the rings, of course. It's a quick on-off sling, but I do prefer to use it when I can expect the child to remain in the sling for at least an hour because it's not as easy on-off as the Hotsling.
Maya Wrap - modified Kangaroo Carry
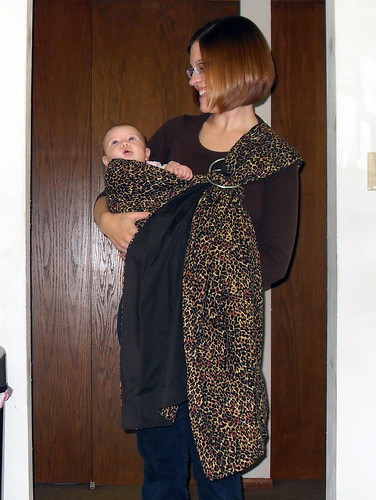
It wasn't too long after Miriam was born that I realized that I was going to need to learn a backcarry. I was desperate! I couldn't do much with her in a front carry in my Moby or Maya wraps because her body got in the way. As she got older, she started to use those little feet to push up on whatever fabric she could get a foothold on and since she has a very long body, she was constantly in my face. I nanny, and part of my job duties are feeding the kids their lunches and dinners, so I want to use the oven and I felt I couldn't do that with her in a front carry. Miriam struggled with colic and the only way to soothe her was to carry her. I obliged because who really wants to hear a baby cry?! I started searching for ways to do back carries, and the most versatile way is to use a woven wrap. Well, I didn't have the money to purchase a good German woven wrap, so I cut up a old curtain that resembled the cotton gauze wraps. It has a slight stretch to it, so it's easy to make a comfortable wrap, but it's not my favorite. I like it a lot for front or hips carries. I can do a back wrap in it, but my arms are not flexible enough to make it a quick venture. I am told that if I invested the money in a good woven wrap that I'll change my mind, and I bet I would! Maybe I will if I have more kids. :-)
Cotton Gauze Wrap - Secure High Back Carry
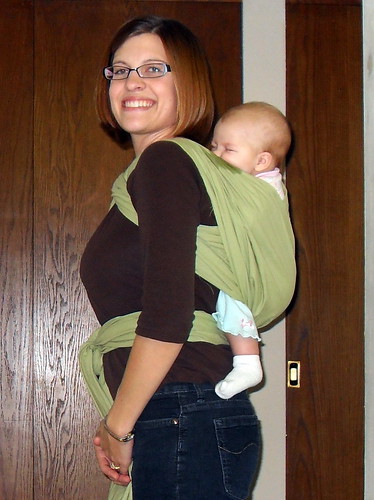
While I was doing my search on options for back carries, a wonderful fellow knitter offered me her Beco Butterfly II. She picked the pattern on this carrier because she liked it, but her husband had beefs with her wearing their son in a pink carrier. She bought it second-hand at half price and offered it to me at 30% off that. Now, that I can certainly afford!! This is a seriously awesome carrier. It is also the only carrier that I can get Chris to use (though he still refuses to use it in public becuase it's pink) It's super easy to get Miriam in and on my back. I wear it a lot on my front too, and in this carrier is primarily where she takes her naps now. I can go from a front to back carry without taking her out or pass her off to Chris in the same manner. I've used it as a back carry for Benjamin when he's asked, but he's still too up and down, go go go, for something like this. He does better in the slings. I am in love with my Beco and I think everyone around me knows it!
Beco Butterfly II - Back Carry
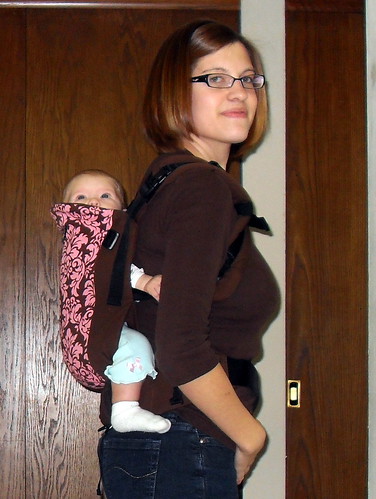
So, those are my carriers. Besides a good German woven wrap (I think I'd like a Storchenwiege), I also don't have a mei tai in my collection. I've been looking at wrap conversion mei tais, specifically one by this Etsy seller!
If you are interested in babywearing or in the market for an affordable secondhand carrier, get over to The Babywearer and check out their forums!!
Friday, January 7, 2011
Thursday, January 6, 2011
New hat
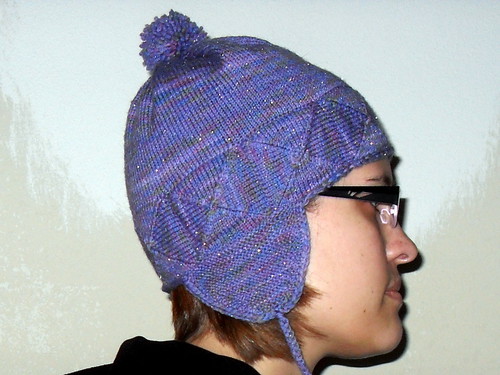
I have a new hat!
Please forgive the no make-up and the indoor picture. It's very cold outside, hence the need for a hat.
I'm in love with the pom-pom. :-)
The pattern is Tympany
Yarn is Dream in Color Starry, colorway Pansy Go Lightly (see the sparkles? That's actual silver)
Needles were a US size 2.
More details on Ravelry here.
I have just enough yarn left to make Miriam a matching hat!
Wednesday, January 5, 2011
BabyLegs
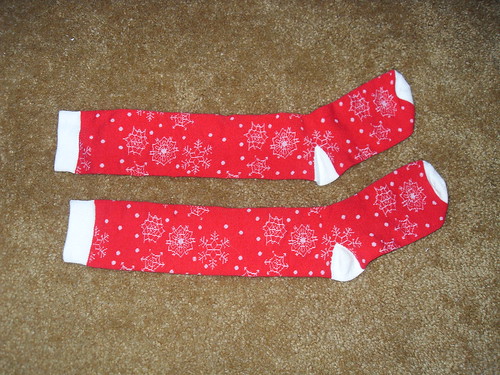
Well, guess who found some time?! I got a new babycarrier in the mail, so I plopped Miriam in and was able to get some handsfree time as long as I kept moving. A little dancing around the sewing machine, and I created some DIY BabyLegs!!
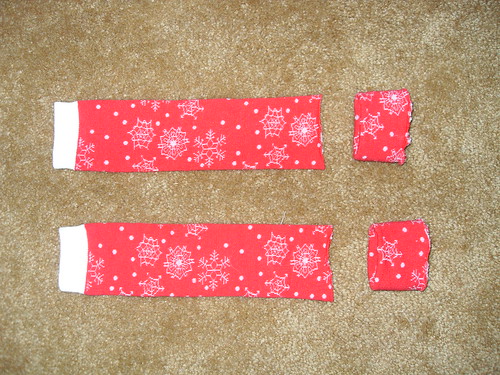
I took a pair of $2.00 knee socks from the women's department at Target.
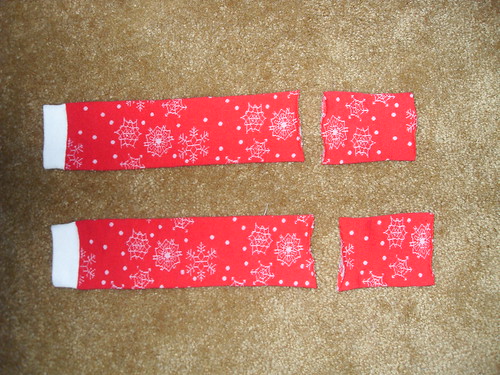
Cut off the toes and heels
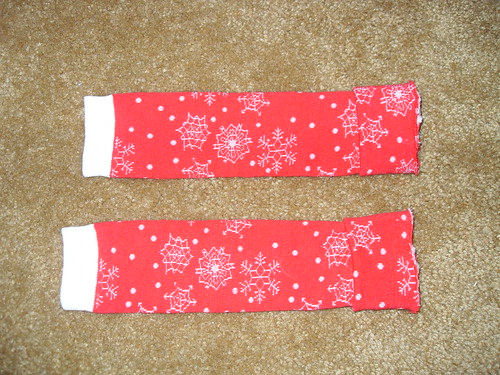
Folded the foot portion in half, wrong sides together to create a cuff
Slipped the leg portion into the cuff so that all three raw edges matched
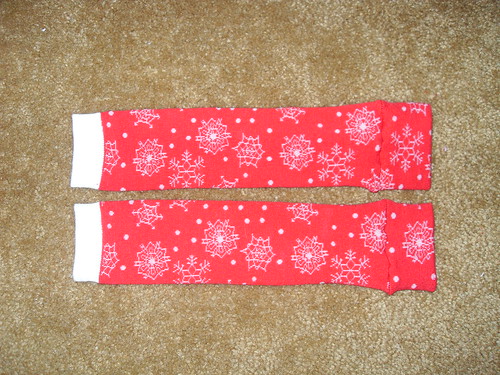
Sewed a zigzag (tension set at length = 2.0, width = 3.0, slightly stretching the fabric as I sewed) at a 1/4 inch seam along the raw edges and flipped the cuff down so the seam was inside
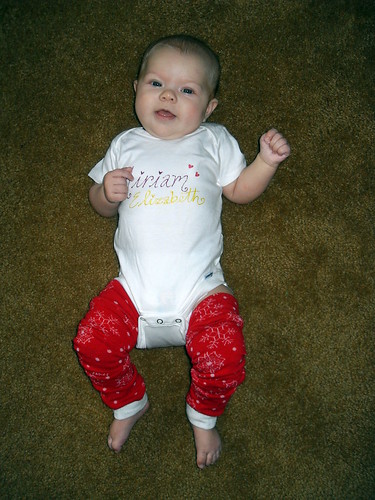
And put them on my baby with her onsie that Aunt Sarah decorated for her!
Super super easy to do. Perfect for babywearing since their pants get hiked up so far in a carrier!
Tuesday, January 4, 2011
Ideas, Ideas, Ideas
I have loads of ideas. I have no time to implement them. This makes me sad. :-(
Sewing:
BabyLegs
a dupioni silk ring sling
several bloomers for Miriam
make a Duck Tape Dress Form for myself
Knitting
finish my Central Park Hoodie
make Chris a reinforced pair of socks since he already wore a hole in the pair of socks I gave him for Christmas last year. :-)
both the kids need new hats. Wish their heads would take a break on growing so fast!
I need 3 or 4 more pairs of socks for myself in order to be able to wear handknit socks everyday. :-)
Miriam needs her own Christmas stocking!
Other Crafting
I want to create a trio of modern paintings to hang over our couch in the living room.
I need some form of keepsakes for Benjamin's and Miriam's current sizes. Ideas?
I want to create a mirror window in our dining room to help bring more light in.
need to hang the picture wall...as soon as I decide which wall that will be!
And of course, the house
the wallpaper needs to finish coming off.
the kitchen ceiling needs to be redone...as soon as the lighting can be rearranged (take down the chandelier, turn the fan into one that contains a light, take down the flourescent lights and turn them into recessed lighting)
then the kitchen cabinets need to be repainted and the walls too
the carpet needs to be taken up and new flooring laid down.
That seems like it should be enough work, doesn't it? Now, where to find the time?!
Monday, January 3, 2011
Green Eggs and Ham...and Cauliflower
Benjamin's favorite bedtime story of late has been Dr. Seuss's Green Eggs and Ham. He helps by reading the "Sam-I-Am" parts. However, it wasn't until today that I realized I could use this book to my advantage.
Benjamin isn't really a picky eater. He'll eat just about every type of food out there, but he will only eat them in specific forms. Such as, he loves chicken, but only in the form of a nugget. You may trick him into eating a broasted or rotissie chicken, but never a baked one. He'll eat his fruit in any which way it comes, often getting histerically upset because I threw the orange peels away and he thought he could eat those too. He won't eat eggs unless they happen to be in the form of an omelette and on my plate, not his and not Daddy's plates.
But vegetables. Vegetables seem to be the nemisis of all small children. Not my son though! And, well, not for any children I feed. See, I don't cook my vegetables. I don't often purchase fresh ones either because of the expense. I feed children frozen vegetables,frozen. I grew up eating frozen vegetables, and I still occassionally grab a handful of frozen corn or peas or a few frozen green beans from the bags in our freezer as a quick snack. Frozen vegetables are much sweeter than the cooked version and the cold is wonderfully refreshing, and likely relieving to the teething children. However, today, I decided to cook some cauliflower...
I don't require Benjamin to finish his plate. I do ask him to please take a bite of everything on it though. Tonight was the battle of cauliflower. After 15 minutes of me trying to slip in just a tiny piece of the white stuff past his lips, I began to recite Green Eggs and Ham in my mind. Ahah!
"You do not like them so you say. Try them! Try them, and you may! Try them and you may, I say!"
And my son ate cooked cauliflower. :-)
Sunday, January 2, 2011
Picture day!
Miriam turned 3 months on December 30th. Such a big strong girl! I thought the over-worrying would not be present with a second child, but I suffer from it just as strongly as I did with Benjamin. The only difference is that I now react differently. I worry that she's not gaining weight appropriately. I worry about her acid reflux. I worry that I'm just plain doing something wrong. Only now, I just don't run to the pediatrician right away. (Actually, I think I'm going to take her in this week just to ease my mind on all my worries. She hasn't been in for just over a month and isn't scheduled for another well-baby visit until the end of February. If, just if, one of my worries substantiates into something real, I'd rather catch it sooner than later.)
We went and had Miriam's 3 month pictures taken and had a family photo taken for good measure. She's such a camera ham! She was laughing and giggling and doing great for the photographer...until she wasn't. She's definitely a hot or cold baby, there's no warm. She's awake or she's asleep, no drowsy state. She's screaming bloody murder or she's calm, there's no warning fussing. Now, taking pictures with a toddler is a different story. He hasn't been the focus of the pictures for almost a year. We'll go back in February for his 2 year portraits so we'll see how he does then.
Saturday, January 1, 2011
Happy New Year!
I'm not one for making resolutions on a new year. Most of the time, it just feels as if you make a light-hearted statement that's forgotten within a few days, if not, within the month. However, I do take a few moments to think about what I would like to be different in the new year. This year, I'll share that with you, since what I would like to be different is more blogging!
I can't guarantee that this is going to interesting. I won't always have a picture to redeem the posts. I won't always have a crafting something or other to post about. It may be a lot of posts about my kids. But I will attempt to post on the blog once a day.
Happy New Year!
I can't guarantee that this is going to interesting. I won't always have a picture to redeem the posts. I won't always have a crafting something or other to post about. It may be a lot of posts about my kids. But I will attempt to post on the blog once a day.
Happy New Year!
Subscribe to:
Posts (Atom)